Briggs And Stratton Primer Bulb Not Working: Troubleshooting Tips & Fixes
The primer bulb on your Briggs and Stratton may not be working due to a clogged fuel line or a faulty bulb.
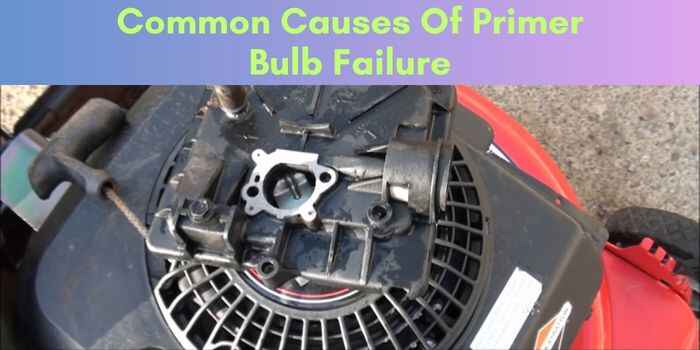
Common Causes Of Primer Bulb Failure
Primer bulb failure in Briggs and Stratton engines can stem from issues like clogged fuel lines, faulty carburetor, or a worn-out bulb. Regular maintenance and proper troubleshooting can help resolve the problem and ensure the primer bulb functions effectively.

The primer bulb is an essential component of a Briggs and Stratton engine, as it helps to pump fuel into the carburetor and get the engine running smoothly.
However, there are times when the primer bulb may not work as expected, causing frustration and inconvenience for users.
In this section, we will explore some common causes of primer bulb failure and discuss possible solutions to get your engine up and running again.
Worn Or Cracked Primer Bulb
- Over time, the primer bulb may become worn or cracked, leading to fuel leakage or air entering the system. This can prevent the bulb from properly priming the engine.
- To determine if this is the issue, carefully examine the primer bulb for any signs of wear or damage. Look for cracks, tears, or deformities.
- If you notice any damage, it is best to replace the primer bulb with a new one. You can find replacement bulbs at most hardware or small engine repair shops.
- Ensure that the new primer bulb is installed correctly, following the manufacturer’s instructions. This will help ensure a proper seal and prevent future issues.
Blocked Fuel Line
- Another common cause of primer bulb failure is a blocked fuel line. When the fuel line becomes clogged, it restricts the flow of fuel to the primer bulb, making it difficult to pump fuel into the carburetor.
- One way to check for a blocked fuel line is to disconnect it from the primer bulb and try blowing through it. If you encounter resistance or no air passes through, it is likely that the fuel line is clogged.
- To unclog the fuel line, you can use a small wire or pipe cleaner to carefully remove any debris or obstructions. Make sure to clean both ends of the fuel line before reconnecting it to the primer bulb.
- It is also a good idea to inspect the fuel tank for any dirt or debris that may have entered. If necessary, clean the fuel tank to prevent future clogs.
Clogged Fuel Filter
- A clogged fuel filter can also prevent the primer bulb from working effectively. The fuel filter acts as a barrier, trapping dirt and debris before they can reach the carburetor. However, over time, the filter can become clogged and hinder fuel flow.
- To check if the fuel filter is clogged, locate it on the fuel line and inspect it for any signs of dirt or blockage. If the filter appears dirty or discolored, it is likely causing the issue.
- You can clean the fuel filter by gently rinsing it with a mixture of soap and water. Ensure that it is completely dry before reinstalling it.
- In some cases, the fuel filter may be severely clogged and require replacement. Be sure to consult the engine’s manual or a professional for guidance on the correct replacement filter.
Fixing A Worn Or Cracked Primer Bulb
Fixing a worn or cracked primer bulb on a Briggs and Stratton engine is crucial for ensuring its proper functioning. Learn how to easily resolve the issue and get your primer bulb working like new again.
Understanding The Anatomy Of A Primer Bulb
- A primer bulb is a small, flexible component that plays a crucial role in the starting process of a Briggs and Stratton engine.
- It is typically made of rubber or another flexible material, and it is located on the carburetor.
- The primer bulb creates the necessary suction to draw fuel into the carburetor and help start the engine.
- The bulb consists of an outer housing, a flexible diaphragm, a check valve, and two fuel lines.
- When the bulb is pressed, it creates pressure that pushes fuel into the carburetor, and when released, it draws fuel back into the bulb.
Steps To Replace A Worn Or Cracked Primer Bulb
- Gather the necessary tools: You will need a wrench, a replacement primer bulb, and possibly a screwdriver, depending on the model of your Briggs and Stratton engine.
- Disconnect the spark plug wire: Safety comes first, so always disconnect the spark plug wire before working on any engine part.
- Locate the primer bulb: The primer bulb is usually attached to the carburetor and can be identified by its rubber appearance.
- Remove the retaining screws: Use a screwdriver or a wrench to remove the screws that secure the primer bulb to the carburetor.
- Disconnect the fuel lines: Carefully detach the fuel lines from the primer bulb, taking note of their positions for reassembly.
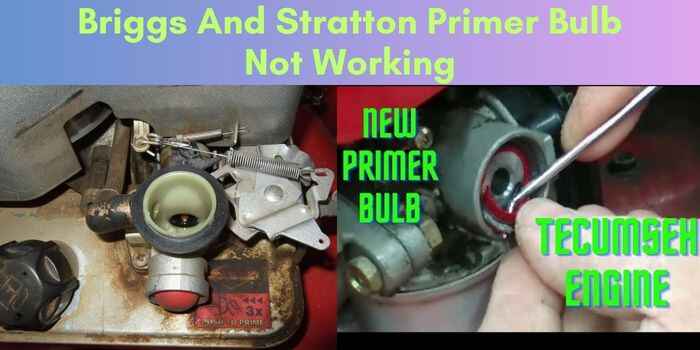
- Replace the old bulb: Take the new primer bulb and position it in place of the old one. Make sure it fits snugly into the mounting holes.
- Reconnect the fuel lines: Attach the fuel lines to the new primer bulb, ensuring they are properly connected. Double-check their positions to avoid any fuel leakage.
- Secure the primer bulb: Use the retaining screws to secure the new primer bulb onto the carburetor.
- Reconnect the spark plug wire: Once you have securely installed the new primer bulb, reconnect the spark plug wire.
Tips For Properly Installing A New Primer Bulb
- When installing a new primer bulb, it’s essential to ensure that it is properly seated and securely attached to the carburetor. A loose primer bulb may result in fuel leaks or difficulty starting the engine.
- Before connecting the fuel lines, inspect them for any signs of wear or damage. If the lines appear cracked or brittle, it’s a good idea to replace them along with the primer bulb.
- Applying a small amount of petroleum jelly to the fuel lines’ connection points can help create a tight seal and prevent any fuel leakage.
- Take note of the fuel lines’ positioning during disassembly to reconnect them correctly. Interchanging the fuel lines may lead to fuel flow issues.
- After installing a new primer bulb, always test it to ensure proper functioning. Press and release the bulb several times, checking for any signs of fuel flowing in and out.
- If you encounter any difficulties during the replacement process, referring to your engine’s user manual or consulting a professional is recommended. They can provide specific guidance based on your engine model.
Clearing A Blocked Fuel Line
If your Briggs and Stratton primer bulb is not working, you can clear a blocked fuel line to solve the issue. Clearing the fuel line will help restore proper fuel flow and ensure the primer bulb functions correctly. Keep your engine running smoothly with this simple fix.
Briggs And Stratton Primer Bulb Not Working:
One of the common issues associated with a Briggs and Stratton primer bulb not working is a blocked fuel line. If the fuel line becomes obstructed, it can prevent the proper flow of fuel to the engine, resulting in a non-functioning primer bulb.
In this section, we will discuss the signs of a blocked fuel line, as well as the steps to clear it.
Signs Of A Blocked Fuel Line:
A blocked fuel line can manifest through various signs. Keep an eye out for the following indicators:
- Engine not starting or running poorly: When the fuel line is blocked, the engine might have difficulty starting or running smoothly.
- Primer bulb not filling with fuel: If you notice that the primer bulb is not filling with fuel or feels unusually soft, it could be due to a blocked fuel line.
- Fuel starvation: A sudden loss of power or sputtering during operation can be an indication of insufficient fuel supply caused by a blockage in the fuel line.
Steps To Clear A Blocked Fuel Line:
Clearing a blocked fuel line can help restore the proper functioning of the primer bulb. Follow these steps to address the issue:
- Disconnect the spark plug wire: As a safety precaution, make sure to disconnect the spark plug wire to prevent any accidental engine starts.
- Locate the fuel line: Identify the fuel line on your Briggs and Stratton equipment. It is typically a small rubber or plastic tube running from the gas tank to the carburetor.
- Remove the fuel line: Carefully disconnect the fuel line from both the gas tank and the carburetor. Ensure that you have a container ready to catch any fuel that may spill.
- Inspect the fuel line: Examine the fuel line for any signs of blockage such as dirt, debris, or clogs. If you notice any obstructions, proceed to the next step.
- Clean the fuel line: Use a small, flexible wire brush or a pipe cleaner to gently remove any debris or blockages from the fuel line. Insert the brush or pipe cleaner into the line and gently maneuver it back and forth to dislodge any obstructions.
- Reconnect the fuel line: Once the fuel line is clear, reattach it securely to both the gas tank and the carburetor. Make sure it is properly seated and tightened.
- Test the primer bulb: Reconnect the spark plug wire and try pressing the primer bulb several times. It should now fill with fuel and feel firm to the touch. If the primer bulb still does not work, there may be another issue that requires further troubleshooting.
Tools You’Ll Need For Unclogging A Fuel Line:
To effectively clear a blocked fuel line, gather the following tools:
- Small, flexible wire brush or pipe cleaner: This tool will help you remove any debris or clogs from the fuel line.
- Container: Have a container ready to catch fuel that may spill when disconnecting the fuel line.
By following these steps and using the necessary tools, you can successfully clear a blocked fuel line and potentially resolve the issue of a non-functioning primer bulb for your Briggs and Stratton equipment.
Cleaning Or Replacing A Clogged Fuel Filter
Cleaning or replacing a clogged fuel filter can fix issues with a Briggs and Stratton primer bulb not working. Keep your engine running smoothly with this simple maintenance task.
Identifying A Clogged Fuel Filter
A clogged fuel filter is a common issue that can cause the primer bulb on your Briggs and Stratton engine to stop working properly. Here are a few signs to look out for to determine if your fuel filter is clogged:
- Engine stalls or has trouble starting
- Lack of power or poor performance
- Difficulty in maintaining consistent engine speed
Steps For Cleaning A Clogged Fuel Filter
Cleaning a clogged fuel filter is a relatively simple task that can help restore proper fuel flow in your Briggs and Stratton engine. Follow these steps to get your engine up and running smoothly again:
- Step 1: Locate the fuel filter housing, which is usually near the carburetor or fuel tank.
- Step 2: Disconnect the fuel line from the fuel filter by carefully loosening the hose clamp or removing the retaining clip.
- Step 3: Remove the fuel filter from the housing and inspect it for any signs of debris or dirt buildup.
- Step 4: If the filter appears clogged, use compressed air or a soft brush to gently clean it. Ensure that the filter is completely free from any dirt particles.
- Step 5: Reinstall the cleaned fuel filter back into the housing and reconnect the fuel line.
- Step 6: Start the engine and check if the primer bulb is working properly.
Steps For Replacing A Clogged Fuel Filter
In some cases, the fuel filter may be beyond cleaning and needs to be replaced. Follow these steps to replace a clogged fuel filter on your Briggs and Stratton engine:
- Step 1: Turn off the engine and locate the fuel filter housing.
- Step 2: Disconnect the fuel line from the fuel filter by carefully loosening the hose clamp or removing the retaining clip.
- Step 3: Remove the old fuel filter from the housing and dispose of it properly.
- Step 4: Install a new fuel filter into the housing, ensuring it is properly seated.
- Step 5: Reconnect the fuel line to the fuel filter and tighten the hose clamp or reattach the retaining clip.
- Step 6: Start the engine and check if the primer bulb is now functioning correctly.
Remember, a clogged fuel filter can impede the proper functioning of your Briggs and Stratton engine.
Regular cleaning or replacement of the fuel filter is essential to maintain optimal performance.
Testing And Maintaining A Functional Primer Bulb
For Briggs and Stratton primer bulb not working issues, proper testing and maintenance are crucial.
Ensure functionality by checking for any leaks, cracks, or blockages in the bulb. Regularly clean and inspect the primer system for optimal performance.
Checking The Functionality Of A Primer Bulb
- Observe the Bulb: Check if the primer bulb is pliable and not cracked or damaged. A bulb that is stiff or shows signs of wear and tear may not function properly.
- Inspect the Fuel Lines: Examine the fuel lines connected to the primer bulb for any cracks, leaks, or blockages. Damaged or clogged lines can hinder the bulb’s performance.
- Press the Bulb: If the bulb does not spring back into its original position when pressed, it may be faulty. A properly functioning primer bulb should fill with fuel and return to its shape upon release.
- Listen for Air Leakage: While pressing the primer bulb, listen for any air leaks. If you hear air escaping, it indicates a problem with the bulb or the fuel lines that need to be addressed.
Steps To Maintain A Working Primer Bulb
- Regular Cleaning: Remove the primer bulb and clean it thoroughly with mild soap and water. Use a small brush or toothbrush to remove any dirt or debris from the bulb and its surrounding area.
- Inspect and Replace: Inspect the bulb’s gasket for any signs of wear or damage. If necessary, replace the gasket to ensure a proper seal. Additionally, check the bulb for cracks or splits and replace it if needed.
- Check Fuel Filters: Ensure that the fuel filters are clean and not clogged. Dirty filters can restrict fuel flow and put strain on the primer bulb’s functionality.
- Clean Fuel System: If the primer bulb is not working properly, it may be due to a clogged fuel system. Clean the fuel tank, carburetor, and fuel lines to remove any obstructions or deposits that could affect the primer bulb.
Tips For Preventing Primer Bulb Issues In The Future
- Use High-Quality Fuel: Always use clean and high-quality fuel to prevent any impurities from clogging the fuel system and affecting the primer bulb’s performance.
- Proper Storage: When not in use, store your equipment with a functioning primer bulb in a dry and clean area to avoid moisture accumulation that could deteriorate the bulb or fuel system.
- Regular Maintenance: Conduct routine maintenance on your equipment, including checking the primer bulb, fuel lines, and filters, to ensure their proper functioning and prevent any potential issues.
- Avoid Ethanol-based Fuels: Ethanol in fuels can cause damage to rubber components, including the primer bulb. Opt for ethanol-free or low ethanol blends to minimize the risk of primer bulb failure.
Maintaining a functional primer bulb is crucial for the efficient operation of outdoor equipment.
By regularly checking its functionality, performing necessary maintenance, and following prevention tips, you can ensure that your primer bulb continues to work reliably, allowing you to tackle your tasks with ease.
Frequently Asked Questions For Briggs
Why Is The Primer Bulb On My Briggs And Stratton Not Working?
The primer bulb on your Briggs and Stratton may not be working due to a clogged fuel line or a faulty bulb. Check for blockages and ensure the bulb is properly seated and not damaged.
How Do I Fix A Briggs And Stratton Primer Bulb That Isn'T Working?
To fix a Briggs and Stratton primer bulb that isn’t working, start by removing the air filter and inspecting the bulb for damage or blockages. Clean or replace the bulb as needed. Check the fuel lines for clogs and ensure they are properly connected.
Can A Dirty Carburetor Cause The Primer Bulb To Stop Working?
Yes, a dirty carburetor can cause the primer bulb to stop working. If the carburetor is clogged or gummed up, it may not provide the proper amount of fuel to the engine. Clean the carburetor or have it professionally serviced to resolve the issue.
Conclusion
To sum it up, if you find yourself struggling with a Briggs and Stratton primer bulb that’s not working, there are several possible solutions to consider. Firstly, ensure that the bulb is securely attached and not damaged. Secondly, check the fuel lines for any blockages or leaks.
Thirdly, clean or replace the carburetor if necessary. Additionally, make sure you are engaging the primer bulb correctly by pressing and releasing it properly. Taking these steps will assist in resolving the issue and getting your equipment up and running again.
Remember, regular maintenance and inspection of your primer bulb can prevent future problems. Don’t hesitate to consult a professional if you are uncertain or need further assistance. Keep your equipment in top shape and enjoy its optimal performance.


