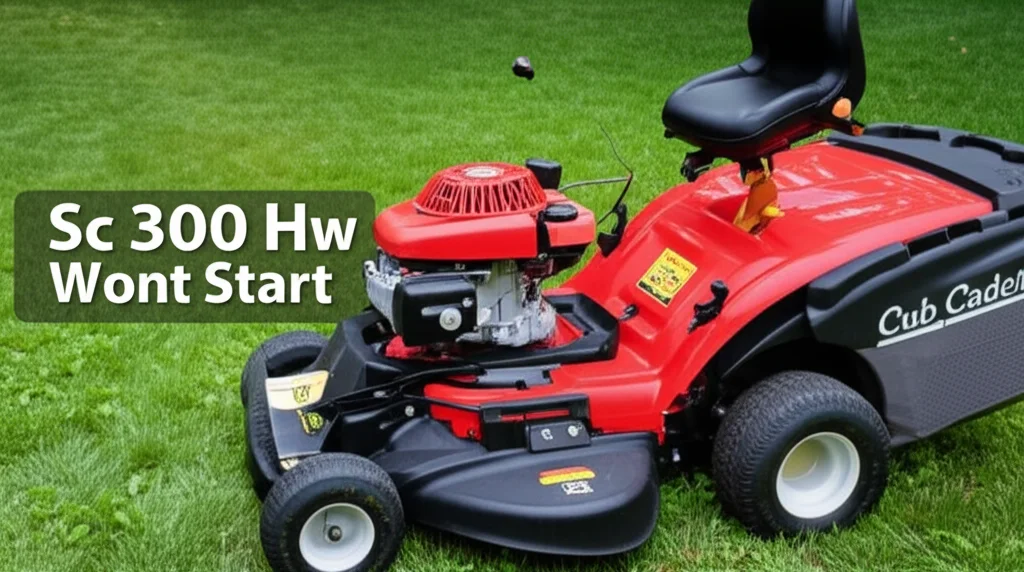
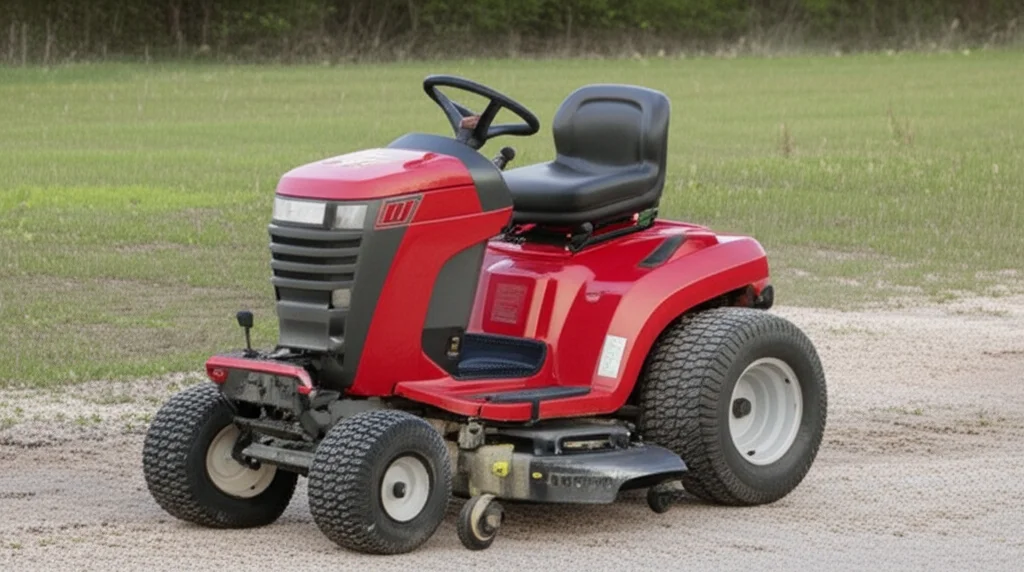
Cub Cadet Xt2 Won't Start

Cub Cadet Xt2 Won’t Start: Troubleshooting Tips

If your Cub Cadet Xt2 won’t start, it could be due to a faulty or disconnected spark plug, a clogged air filter, or a contaminated fuel tank. Other possible causes include a faulty carburetor, dirty cutting deck, dysfunctional flywheel brake, or a damaged starter solenoid.

To troubleshoot the issue, check and clean the spark plug, replace the air filter if necessary, drain and refill the fuel tank, clean the carburetor, inspect the cutting deck and flywheel brake, and replace the starter solenoid if damaged.

Checking The Battery

If your Cub Cadet XT2 won’t start, one possible issue to check is the battery. Ensure it is properly connected and charged to ensure proper power supply to start the mower.

Is your Cub Cadet Xt2 not starting? Before you panic and take it to the shop, there are a few things you can check on your own.

One of the common causes of starting issues is a battery problem. Here are some steps to take to inspect, test, and replace the battery if necessary:

Inspecting Battery Connections:

  • Begin by checking the battery connections for any signs of corrosion or looseness.
  • Ensure that the battery cables are securely attached to the battery terminals.
  • If you notice any corrosion on the terminals, use a wire brush to clean them.
  • Make sure there are no loose or damaged wires connected to the battery.

Testing Battery Voltage:

  • Use a multimeter to test the voltage of the battery.
  • Set the multimeter to DC voltage and connect the red lead to the positive terminal and the black lead to the negative terminal.
  • A fully charged battery should have a voltage reading of around 12.6 volts.
  • If the voltage is significantly lower, it may indicate a weak or discharged battery.

Replacing The Battery If Necessary:

  • If the battery voltage is low or if you suspect the battery is faulty, it is recommended to replace it.
  • Purchase a new battery that is compatible with your Cub Cadet Xt2 model.
  • Disconnect the old battery by removing the negative (-) cable first and then the positive (+) cable.
  • Install the new battery by connecting the positive (+) cable first and then the negative (-) cable.
  • Make sure the battery is securely fastened in place.

Remember, checking the battery is just the first step in troubleshooting a starting issue. If the problem persists after inspecting and replacing the battery, it’s recommended to seek professional assistance or refer to the manufacturer’s manual for further troubleshooting steps.

Examining The Ignition Switch

If your Cub Cadet XT2 won’t start, one possible issue to examine is the ignition switch. Make sure to check if the ignition switch is functioning properly before taking your mower to a shop.

Understanding The Function Of The Ignition Switch:

The ignition switch is a crucial component of your Cub Cadet XT2 that is responsible for starting the engine. It is located on the control panel and is turned on by the key.

When the ignition switch is activated, it completes the circuit and allows electricity to flow to the starter motor, which in turn initiates the engine’s cranking.

If your Cub Cadet XT2 won’t start, it’s essential to examine the ignition switch and ensure it is functioning correctly.

Checking For Loose Or Damaged Wires:

Loose or damaged wires can disrupt the flow of electricity to the ignition switch, resulting in a failure to start your Cub Cadet XT2. To check for loose or damaged wires, follow these steps:

  • Inspect the wiring harness connected to the ignition switch for any loose connections or frayed wires.
  • Ensure that all wires are securely attached to their respective terminals.
  • Look for any signs of damage to the wiring, such as worn insulation or exposed wires.

If you find any loose or damaged wires, it is crucial to address them before attempting to start your Cub Cadet XT2.

Testing The Ignition Switch With A Multimeter:

A multimeter is a handy tool for diagnosing electrical issues, including problems with the ignition switch.

Follow these steps to test the ignition switch using a multimeter:

  • Set your multimeter to the resistance or continuity mode.
  • Disconnect the wiring harness connected to the ignition switch.
  • Touch one of the multimeter probes to the terminal on the ignition switch and the other probe to the ground or metal part of the tractor.
  • The multimeter should display a reading close to zero ohms or show continuity, indicating that the ignition switch is functioning correctly.
  • Repeat the test for each terminal on the ignition switch.

If the multimeter does not show any reading or continuity, it indicates a faulty ignition switch that needs to be replaced.

Inspecting The Fuel System

When your Cub Cadet XT2 won’t start, checking the fuel system is essential. Ensure that the fuel tank is not empty, verify the fuel filter for any clogs, and make sure fuel is reaching the carburetor or injectors.

When your Cub Cadet XT2 refuses to start, it can be frustrating. One common issue that can cause a lawnmower not to start is a problem with the fuel system. By inspecting the fuel system, you can identify any issues and take the necessary steps to get your XT2 up and running again.

Here are the key areas to check:

Checking The Gas Tank For Fuel:

  • Ensure that the gas tank has an adequate amount of fuel.
  • If the gas tank is empty, fill it up with fresh gasoline.
  • Make sure there are no leaks or clogs in the gas tank.

Examining The Fuel Filter For Clogs:

  • Locate the fuel filter on your XT2. It’s typically located between the gas tank and the carburetor.
  • Remove the fuel filter and inspect it for any clogs or debris.
  • If there are signs of clogging, clean or replace the fuel filter as necessary.

Testing The Fuel Pump For Proper Operation:

  • Locate the fuel pump on your Cub Cadet XT2. It is usually located near the gas tank or carburetor.
  • Start the engine and observe the fuel pump for proper operation.
  • Listen for any unusual noises or vibrations coming from the fuel pump.
  • Ensure that fuel is being pumped through the system effectively.

Testing The Solenoid

Having trouble starting your Cub Cadet Xt2? Before taking it to the shop, try testing the solenoid. Check its location, replace if necessary, and run a test to get your mower up and running again.

Locating The Solenoid On The Cub Cadet Xt2:

  • The solenoid on the Cub Cadet Xt2 is an essential component responsible for starting the engine.
  • It is located near the battery, often mounted on the side of the engine or on the frame of the tractor.
  • To find it, first, locate the battery and trace the positive cable. The solenoid is usually connected to the positive terminal of the battery.

Checking The Original Solenoid For Defects:

  • Before replacing the solenoid, it is important to check if the original solenoid is defective.
  • Start by inspecting the wiring connections to ensure they are secure and free from corrosion or damage.
  • Check the solenoid for any signs of physical damage or rust that may affect its proper functioning.
  • Use a multimeter to test the solenoid’s continuity and ensure that it is receiving and sending the electrical signal properly.

Replacing The Solenoid If Necessary:

  • If the original solenoid is found to be defective, it is important to replace it to ensure the proper starting of the Cub Cadet Xt2.
  • Begin by disconnecting the battery’s negative terminal to avoid any electrical accidents.
  • Locate the mounting bolts or screws that secure the original solenoid in place and remove them.
  • Disconnect the electrical connections from the solenoid, taking note of their positions to ensure proper reinstallation.
  • Install the new solenoid by connecting the wires to the appropriate terminals and securing it with the mounting bolts or screws.
  • Finally, reconnect the battery’s negative terminal and test the Cub Cadet Xt2 to ensure that it starts properly.

Remember, if you are not comfortable performing these steps or if you are unsure about the issue, it is always best to consult a professional or take your Cub Cadet Xt2 to a certified service center for assistance.

Troubleshooting The Fuse

Troubleshooting the fuse on your Cub Cadet XT2 to address the issue of it not starting. Check the battery, fuse location, gas tank, fuel filter, air filter, and solenoid to ensure proper functionality and solve the problem.

If your Cub Cadet XT2 won’t start, one of the potential culprits could be a blown fuse. Troubleshooting the fuse is a simple process that involves locating the fuse on the mower, checking it for continuity, and replacing it if necessary.

Follow the steps below to troubleshoot the fuse and potentially resolve the starting issue.

Locating The Fuse On The Mower:

  • Look for the fuse box, which is typically located near the battery or under the engine hood.
  • Open the fuse box to access the fuse.
  • Identify the fuse specifically labeled for the ignition system.

Checking The Fuse For Continuity:

To determine whether the fuse is blown or functioning correctly, follow these steps:

  • Use a multimeter or a fuse tester to check for continuity.
  • Place the multimeter’s probes on both ends of the fuse or insert the fuse into the tester.
  • If the multimeter displays a reading or the tester indicates continuity, the fuse is not blown and is functioning properly.
  • If there is no reading or the tester does not indicate continuity, this indicates a blown fuse.

Replacing The Fuse If It Is Blown:

If the fuse is blown, follow these steps to replace it:

  • Make sure the mower is turned off and the ignition is in the “off” position.
  • Use a pair of needle-nose pliers to carefully remove the blown fuse from its socket.
  • Insert a new fuse of the same rating into the socket.
  • Ensure that the fuse is securely seated and making proper contact.
  • Close the fuse box and make sure all connections are secure.

Following these steps should help troubleshoot the fuse in your Cub Cadet XT2 and potentially resolve any starting issues. If the problem persists, it’s recommended to consult a professional or contact Cub Cadet customer support for further assistance.

Cleaning Or Replacing The Air Filter

When your Cub Cadet Xt2 won’t start, one potential issue to check is the air filter. A dirty or clogged air filter can prevent proper airflow and cause starting problems. Cleaning or replacing the air filter may help resolve the issue.

Removing The Air Filter:

  • Start by locating the air filter housing, which is usually on the side of the engine.
  • Use a screwdriver or socket wrench to loosen and remove the screws or bolts holding the housing in place.
  • Gently lift the housing to access the air filter.
  • Carefully remove the old air filter from the housing, making sure not to drop any debris into the engine.
  • Inspect the air filter for any visible signs of damage or dirt buildup.

Cleaning The Air Filter:

  • If the air filter appears dirty but still in good condition, you can clean it to improve its performance.
  • Start by tapping the air filter gently on a hard surface to remove loose dirt and debris.
  • Use a soft brush or toothbrush to gently brush away any remaining dirt or debris.
  • If necessary, you can also rinse the air filter with water from the inside out to remove stubborn dirt.
  • Allow the air filter to dry completely before reinstallation.

Installing A New Air Filter If Needed:

  • If the air filter is damaged, excessively dirty, or worn out, it is best to replace it with a new one.
  • Purchase a compatible air filter for your Cub Cadet XT2 model from a reputable supplier or store.
  • Place the new air filter into the housing, ensuring it is properly aligned.
  • Gently press the air filter into place, making sure it is securely seated.
  • Replace the air filter housing and tighten the screws or bolts to secure it in place.
  • Finally, start your Cub Cadet XT2 and ensure that the new air filter allows for proper engine operation.

Cleaning or replacing the air filter is an essential maintenance task for your Cub Cadet XT2, as a dirty or damaged air filter can restrict airflow and affect engine performance. By following these simple steps, you can effectively maintain your mower’s air filter and keep it running smoothly.

Remember to check or clean the air filter regularly and replace it as needed to optimize the performance of your Cub Cadet XT2.

Checking The Choke

If your Cub Cadet Xt2 won’t start, one possible solution is to check the choke. Make sure the choke is functioning properly and not causing any fuel flow issues.

Understanding The Function Of The Choke:

  • The choke is a crucial part of a Cub Cadet Xt2’s starting system.
  • Its main function is to control the air-to-fuel ratio during the engine’s startup.
  • By adjusting the choke, you can increase the amount of fuel in the mix, making it easier to start the engine.
  • It is essential to make sure the choke is functioning correctly before attempting to start the Cub Cadet Xt2.

Inspecting The Choke For Proper Operation:

  • Start by visually inspecting the choke for any signs of damage or wear.
  • Make sure the choke lever or knob is not loose or broken.
  • Check the choke plate and ensure it moves smoothly without any obstructions.
  • Look for any debris or dirt that may be affecting the choke’s movement.
  • Inspect the choke linkage and make sure it is properly connected and not bent or damaged.

Adjusting Or Replacing The Choke As Needed:

  • If you notice any issues with the choke during the inspection, it may need to be adjusted or replaced.
  • To adjust the choke, follow the instructions in the Cub Cadet Xt2 owner’s manual.
  • If the choke cannot be adjusted, it may be necessary to replace it with a new one.
  • Look for genuine Cub Cadet choke parts to ensure compatibility and optimal performance.
  • Remember to test the choke after making any adjustments or replacements to ensure it is functioning correctly before starting the Cub Cadet Xt2.

Remember, if you’re unsure about how to inspect or adjust the choke, it’s always recommended to refer to the Cub Cadet Xt2 owner’s manual or consult a professional for assistance.

Verifying The Parking Brake

To verify the parking brake on your Cub Cadet XT2 won’t start, ensure that it is properly engaged before attempting to start the mower.

Ensuring The Parking Brake Is Engaged:

  • Verify that the parking brake on your Cub Cadet XT2 is engaged before attempting to start the engine. This is an important step in the starting process and ensures the safety of both you and the machine.

Checking The Brake System For Any Issues:

  • Inspect the brake system of your Cub Cadet XT2 for any potential issues that may prevent it from starting. Check for loose or damaged wires, worn-out brake pads, or any obstructions that may be hindering the brakes from engaging properly.

Adjusting Or Repairing The Parking Brake If Necessary:

  • If you find any issues with the parking brake, it may need to be adjusted or repaired. Here are the steps to follow:
  • First, consult the Cub Cadet XT2 owner’s manual for specific instructions on adjusting the parking brake.
  • Locate the parking brake adjustment mechanism, usually located near the rear of the machine.
  • Follow the manufacturer’s instructions for adjusting the parking brake tension. This may involve tightening or loosening a nut or bolt.
  • Test the parking brake by engaging and disengaging it a few times to ensure it functions properly.
  • If the parking brake is still not working correctly, it may be necessary to repair or replace any damaged components. Consult a professional or contact Cub Cadet customer support for guidance.

Remember, a properly engaged parking brake is essential for the safe operation of your Cub Cadet XT2. Always ensure that the parking brake is engaged before starting the engine to avoid any potential accidents or damage to the machine.

Final Steps

If your Cub Cadet XT2 won’t start, try these troubleshooting steps before taking it to the shop. Check the battery, fuse, gas tank, fuel filter, and air filter. Make sure the parking brake is locked and the solenoid is attached properly.

After following the previous steps to troubleshoot why your Cub Cadet XT2 won’t start, there are a few final steps you can take to ensure everything is properly installed and connected. These steps include:

Reinstalling the solenoid:

  • The solenoid is responsible for connecting the battery to the starter motor, so it’s important to ensure it is properly installed. Follow the steps below to reinstall the solenoid:
  • Locate the solenoid on your Cub Cadet XT2. It is usually located near the battery or on the engine.
  • Line up the mounting holes on the solenoid with the corresponding holes on the engine or mower frame.
  • Insert the mounting bolts through the holes and tighten them securely.
  • Double-check that the wiring harness is properly connected to the solenoid.

Attaching the wires correctly:

Properly connecting the wires is crucial for the Cub Cadet XT2 to start.

Follow these steps to attach the wires correctly:

  • Identify the wires that were disconnected during the troubleshooting process. Refer to the owner’s manual or the wiring diagram (if available) to ensure you connect the wires to the correct terminals.
  • Clean the terminals on both the wires and the solenoid to ensure a good connection.
  • Attach each wire to its corresponding terminal on the solenoid, making sure they are securely fastened.
  • Double-check that all the wires are in their proper places and are tight.

Test running the Cub Cadet XT2:

Once you have reinstalled the solenoid and attached the wires correctly, it’s time to test run the mower to confirm that the issue has been resolved.

Follow these steps to test run your Cub Cadet XT2:

  • Make sure the parking brake is engaged and the cutting deck is disengaged.
  • Sit on the operator seat and turn the ignition key to the “Start” position.
  • Watch and listen for any signs of the engine cranking or starting.
  • If the Cub Cadet XT2 starts successfully, let it run for a few minutes to ensure it is running smoothly.
  • If the mower still doesn’t start or if you encounter any other issues, it may be necessary to seek professional assistance.

Frequently Asked Questions

What To Do When Cub Cadet Won't Start?

If your Cub Cadet won’t start, try these steps: 1. Check the battery and fuse location. 2. Ensure there is enough gas in the tank and check the fuel filter. 3. Clean or replace the air filter if necessary. 4.

Ensure the parking brake is engaged. 5. Check the solenoid and ignition switch. 6. Inspect the carburetor, cutting deck, and flywheel brake. 7. If all else fails, consult a professional.

Why Is My Lawn Mower Cranking But Not Starting?

Your lawn mower may crank but not start due to various reasons such as a faulty spark plug or wire, a clogged air filter, or contaminated fuel. A dysfunctional carburetor or flywheel brake can also be the cause.

Why Won't My Cub Cadet Engage?

If your Cub Cadet won’t engage, it could be because the PTO clutch is not getting power or is worn out. The clutch solenoid could also be defective. You may need to replace the PTO clutch or check the solenoid.

Make sure to consult your model number for assistance.

Conclusion

If you are experiencing difficulties with your Cub Cadet XT2 not starting, there are several potential causes to consider. Firstly, check the basics such as the battery, fuel tank, fuel filter, air filter, and spark plug. Ensure that all these components are clean, connected properly, and functioning correctly.

Additionally, inspect the solenoid and PTO clutch to ensure they are in good working order. It is also important to check for any faults in the ignition switch module and starter solenoid. Troubleshooting these areas can often resolve starting issues with the Cub Cadet XT2.

Remember to regularly maintain and service your lawn mower to prevent future starting problems. By following these steps, you can get your Cub Cadet XT2 up and running smoothly again and keep your lawn looking its best.

Similar Posts