· Outdoor Power Equipment · 24 min read
Husqvarna Weed Eater Troubleshooting Quickly Fix Common Issues

Husqvarna Weed Eater Troubleshooting: Get Back to Work Fast
Is your Husqvarna weed eater refusing to cooperate? Don’t let a malfunctioning trimmer ruin your weekend! A frustrating weed eater can quickly turn yard work into a chore.
This guide will walk you through common Husqvarna weed eater problems and provide quick, easy-to-follow solutions. We’ll cover everything from starting issues to line feed problems, helping you get your trimmer back in top shape. Let’s dive in and get your yard looking its best.
Takeaway:
- Regular maintenance prevents many issues.
- Check the fuel system for common starting problems.
- Proper line loading is key for consistent trimming.
- Spark plug issues can cause engine malfunctions.
Quick Answer: Most Husqvarna weed eater problems stem from simple issues like old fuel, a clogged air filter, or incorrect string loading. Regularly cleaning and maintaining your trimmer, along with checking these common culprits, will usually resolve the problem.
Husqvarna Weed Eater Troubleshooting: A Comprehensive DIY Guide for Optimal Performance
Maintaining a Husqvarna weed eater ensures a pristine yard, but like any hardworking tool, these machines can encounter operational challenges. A non-starting engine, unexpected stalling, rough running, or issues with the cutting head can quickly turn a routine chore into a frustrating ordeal.
Fortunately, many common Husqvarna string trimmer problems can be diagnosed and resolved with a systematic approach and a few basic tools.
This guide aims to empower homeowners and enthusiasts with the knowledge to troubleshoot effectively, saving time, money, and the hassle of professional service calls.
This report delves into the most frequent issues encountered with Husqvarna weed eaters, offering detailed diagnostic steps and actionable solutions.
It covers everything from fundamental engine principles to specific component repairs and crucial preventative maintenance strategies, ensuring the trimmer remains a reliable partner in lawn care.
Essential Pre-Checks & Safety First
Before attempting any troubleshooting or repair on a Husqvarna weed eater, prioritizing safety is paramount.
Overlooking basic precautions can lead to serious injury or further damage to the equipment.
Always ensure the engine has completely cooled down before touching any components.
This prevents burns from hot surfaces. A critical safety step is to remove the spark plug wire and boot.
This simple action prevents any accidental engine starts while work is being performed.
Additionally, wearing appropriate personal protective equipment (PPE), such as work gloves and eye protection, is highly recommended. Always work in a well-ventilated area, particularly when handling fuel or carburetor cleaners.
Most small engine problems, including those affecting Husqvarna weed eaters, can be traced back to one of three fundamental elements: fuel, air, or spark.
The engine requires the correct amount of clean, fresh fuel. It also needs a clear path for air to mix with that fuel, and finally, a strong spark to ignite the mixture.
Understanding this core principle provides a methodical framework for diagnosing and resolving issues, allowing for a more efficient and logical approach to troubleshooting rather than random trial-and-error.
Diagnosing & Fixing Common Husqvarna Weed Eater Problems
This section provides detailed, step-by-step troubleshooting for various symptoms, guiding users through the diagnostic process using a problem-description-cause-solution format.
Problem: Husqvarna Weed Eater Won’t Start
 Description:
Your Husqvarna string trimmer refuses to fire up, making it impossible to tackle your yard work. This is one of the most common and frustrating issues.
Causes & Solutions:
Cause: Old or Stale Fuel
Description:
Modern gasoline, especially blends containing ethanol, can degrade in as little as 30 days.
Over time, lighter ingredients evaporate, leaving behind a thick, sticky varnish or gum that clogs vital parts of the fuel system.
Solution:
Drain all old fuel from the tank and replace it with fresh, properly mixed fuel.
For 2-stroke engines, it is essential to use the correct 50:1 gas-to-oil ratio and consider ethanol-free fuel with a fuel stabilizer for extended storage.
Cause: Clogged Fuel Filter
Description:
This small filter, typically submerged in the fuel tank, cleans fuel before it reaches the carburetor.
If old fuel has left behind residue, this filter can become clogged, starving the engine of fuel.
Solution:
Replacing the fuel filter is often a necessary step.
Refer to the detailed “Fuel Line and Filter Replacement” steps below.
Cause: Clogged Fuel Lines
Description:
The fuel lines themselves can become cracked, hardened, or visibly blocked, preventing proper fuel delivery.
Solution: Inspect the fuel lines for damage.
If damaged, they should be replaced following the fuel line replacement steps described below.
Cause: Clogged Carburetor
Description:
Even if the fuel filter is clear, sticky fuel residue can directly clog the tiny passages within the carburetor, preventing proper fuel delivery.
Solution:
A first attempt to clear this involves spraying carburetor cleaner directly into the intake (after removing the air filter) and allowing it to sit for several minutes to dissolve varnish.
If this is not effective, disassembling and thoroughly cleaning the carburetor may be necessary.
It is advisable to document the process with photographs, as carburetors contain many delicate gaskets, tiny screws, and needle valves.
If cleaning proves insufficient, a carburetor rebuild kit or even a full replacement might be required.
The decision to rebuild or replace often depends on the complexity of the repair versus the cost of a new part, allowing users to make practical choices based on their skill and resources.
Cause: Fouled or Damaged Spark Plug
Description:
The spark plug is the ignition source for the engine. Carbon deposits on the electrode prevent the plug from firing properly, or the plug itself may be worn or damaged (e.g., a cracked porcelain insulator or a burned electrode).
Solution:
Inspect the spark plug for signs of wear, damage, or heavy carbon buildup. If fouled or damaged, replacing the spark plug is recommended, as they are inexpensive components.
To confirm if the spark plug is defective, a spark plug tester can be used; a strong spark should be visible between the tester’s terminals when the engine is cranking.
If a new plug is not immediately available, cleaning deposits from the electrode with light-duty sandpaper and checking the gap (referencing the owner’s manual for the correct size) can be attempted.
Cause: Faulty Ignition Coil
Description:
If the spark plug is confirmed to be in good condition but the engine still does not produce a spark, the ignition coil is likely at fault.
Solution:
A faulty ignition coil requires replacement, which typically represents a more advanced repair.
Cause: Clogged Air Filter
Description:
A dirty or clogged air filter restricts the engine’s air supply, leading to an overly rich fuel-to-air mixture (too much fuel, not enough air). This imbalance prevents the engine from starting or running properly.
Solution:
The air filter should be removed and inspected. Loose debris can be brushed away from the cover and element.
For rigid filters, tapping them on a tabletop or by hand can dislodge dirt.
Compressed air can also be used, but it should be directed from the inside out to avoid lodging debris deeper into the filter material.
Paper filters should not be washed, but foam filters can be cleaned with mild detergent and warm water.
If the filter is excessively dirty, damaged, or cannot be cleaned effectively, replacement is necessary.
Cause: Broken Rewind Spring or Defective Recoil Starter
Description:
When the starter rope is pulled, the rewind spring recoils it onto the pulley.
If the rope does not retract, the spring is likely broken. The recoil starter assembly engages the crankshaft to turn over the engine.
If this assembly is defective, the engine won’t start.
Solution:
If the rewind spring is broken, it requires replacement. While individual springs can sometimes be replaced, it is often simpler and more effective to replace the entire recoil starter assembly.
To inspect the assembly, pull the rope and observe if the tabs grab the engine hub and retract when released.
Fuel Line and Filter Replacement (Detailed Steps)
Step-by-step Fuel Filter/Line Replacement:
- Ensure the engine is cool and the fuel tank is empty.
2. Disconnect the spark plug wire.
3. Loosen the knob to release the air filter cover and remove the filter.
4. Use an 8mm socket or nut driver to unthread the air filter housing mounting nuts.
5. Lift the choke lever and remove the housing.
6. Detach the throttle cable from the carburetor.
7. Note the orientation of the fuel lines, then detach them from the carburetor and set it aside.
8. Remove the fuel cap and retainer.
9. If replacing the fuel line with the filter, use a wire with a hook to pull out the old fuel filter from the tank.
10. Cut the old line as close to the tank as possible, then push the line through the tank and remove it.
11. Prepare the new fuel line: cut one end at an angle, then feed it through the hole in the tank until it exits the fill spout.
12. Cut off the angled portion. Transfer the connector from the old line to the new one.
13. Trim a new section of fuel line to the same length as the old line connected to the fuel filter, then attach it to the connector.
14. Pull the fuel filter off the old line and attach it to the new line.
15. Pull the new line through the tank until the connector reaches the hole; ensure the filter rests inside the tank.
16. Trim the new line to approximately two inches.
17. Insert the fuel cap retainer and thread on the cap.
18. Attach the fuel lines to the appropriate carburetor ports.
19. Attach the Z-end of the throttle cable to the carburetor.
20. Align the carburetor on the mounting posts, confirm the cable mount is properly positioned, then push the carburetor into place.
21. With the choke lever up, realign the air filter housing and secure it with the nuts.
22. Open the choke and replace the air filter.
23. Reposition the air filter cover and tighten the knob to secure it.
24. Reattach the spark plug wire, refill the fuel tank, and test the trimmer.
Problem: Husqvarna Weed Eater Starts Then Stalls
Description:
Your Husqvarna weed eater sputters to life only to die shortly after, indicating an issue preventing the engine from sustaining combustion.
This often happens as the engine warms up.
Causes & Solutions:
Cause: Clogged Spark Arrestor
Description:
This small screen prevents sparks from exiting the muffler. Over time, it can become clogged with soot, restricting exhaust gas flow.
This restriction chokes the engine, causing it to stall, particularly as it warms up.
Solution: The spark arrestor, often found in the muffler assembly, should be removed and cleaned thoroughly with a wire brush.
If it is heavily clogged or damaged, replacement is recommended.
Cause: Carburetor Issues
Description:
A clogged carburetor remains a prime suspect.
Even if it allows enough fuel for an initial start, internal blockages can prevent the consistent fuel delivery needed to keep the engine running, leading to stalling.
Solution:
Cleaning with a carburetor cleaner is the first step.
If the problem persists, a carburetor rebuild or replacement might be necessary.
Cause: Fuel Filter Restriction
Description:
A partially clogged fuel filter can supply just enough fuel for a brief start but then restrict the flow, causing the engine to starve and stall.
Solution:
Draining any old fuel from the tank and replacing the fuel filter is the recommended solution.
Refer to the detailed fuel filter replacement steps in the “Husqvarna Weed Eater Won’t Start” section for guidance.
Cause: Dirty Air Filter
Description:
A clogged air filter can lead to an overly rich fuel-to-air mixture. While the engine might initially start, it struggles to breathe properly, causing it to choke and stall.
Solution:
Inspection, cleaning, or replacement of the air filter should be performed as detailed in the “Husqvarna Weed Eater Won’t Start” section.
Problem: Husqvarna Weed Eater Runs Rough or Bogs Down
Description:
Your Husqvarna weed eater runs erratically, sputters, surges, or loses power (“bogs down”) when throttle is applied.
This typically indicates an imbalanced fuel-to-air mixture or restricted flow.
Causes & Solutions:
Cause: Carburetor Adjustment & Clogging
Description:
A clogged or improperly adjusted carburetor is a very common cause of rough running.
Solution: Carburetor Adjustment (L & H Screws): Many 2-stroke carburetors feature adjustment screws to fine-tune the fuel-air mixture for different engine speeds.
These are typically labeled “L” (Low speed mixture), “H” (High speed mixture), and sometimes an idle adjustment screw.
Special Tools:
Many modern Husqvarna carburetors feature limiter caps that prevent full adjustment or require specialized tools, such as ‘pac-man’ or ‘half-moon’ shaped screwdrivers.
While a tachometer is ideal for precise RPM measurement, experienced users may attempt to “ear tune” the engine.
General Adjustment Procedure:
- Initial Setting: If the screws have been turned, a good starting point is to gently turn both L and H screws clockwise until they lightly seat, then back them out 2 to 2.5 full turns counter-clockwise.
2. Warm Up: Start the engine and allow it to warm up for a minute or two.
3. Idle Speed (Idle Screw): Adjust the idle screw (if present) to achieve a reliable idle that is fast enough to keep the engine running but slow enough that the cutting head does not engage.
4. Low Speed (L Screw): This screw controls the fuel mixture at idle and during acceleration from idle. Turn the L screw clockwise until the engine sounds as if it is about to stall, then back it out counter-clockwise by 1/4 to 1/2 turn. If the trimmer bogs down on acceleration, turn the L screw counter-clockwise in small 1/8 turn increments, allowing a few seconds for the engine to respond after each adjustment.
5. High Speed (H Screw): This screw controls the fuel mixture at full throttle. Hold the throttle wide open. Turn the H screw counter-clockwise until the engine runs smoothly and reaches its fastest RPM, then turn it clockwise by about 1/4 turn. If the engine is bogging at full throttle, try turning the H screw clockwise in small increments.- Lean vs. Rich Mixture:
- Lean (Too Little Fuel): Symptoms include hesitation, sputtering, backfiring, a high-pitched popping sound from the exhaust, and the engine running too fast. Running too lean can cause severe engine damage or “burn down” the engine due to insufficient lubrication and overheating.
- Rich (Too Much Fuel): Symptoms include black smoke emissions, sluggish acceleration, fouled spark plugs, a strong smell of unburned fuel, and lower RPM. While less damaging than a lean condition, it will result in poor performance and plug fouling.
- Goal: The objective is to achieve a “rich of peak” setting (slightly richer than the fastest RPM) for optimal performance and engine longevity.
- Lean vs. Rich Mixture:
Solution: Clogged Carburetor:
If adjustment does not resolve the rough running, the carburetor likely has internal clogs that require thorough cleaning or replacement.
Cause: Restricted Fuel Filter or Dirty Air Filter
Description:
Similar to starting and stalling issues, restricted fuel or air flow can cause rough running.
Solution:
Inspection, cleaning, or replacement of these filters should be performed as detailed in the “Husqvarna Weed Eater Won’t Start” section.
Cause: Defective Spark Plug
Description:
A fouled, worn, or damaged spark plug will lead to incomplete combustion, causing the engine to run roughly.
Solution:
Inspection for carbon buildup, damage, or wear is necessary, with replacement if required.
Cause: Clogged Spark Arrestor
Description:
A carbon-clogged spark arrestor restricts exhaust flow, leading to power loss and rough running.
Solution:
Cleaning with a wire brush or replacement is the solution.
Problem:
Husqvarna Weed Eater Head Issues (Won’t Spin / Won’t Stop Spinning)
Description:
Problems with the cutting head’s operation are typically mechanical rather than engine-related, focusing on the power transmission system.
Causes & Solutions:
Problem: Trimmer Head Won’t Spin
Description:
The cutting head fails to rotate when the engine is running.
Causes:
This problem usually points to an issue with the clutch, a damaged drive shaft, or internal problems within the gearbox.
The clutch engages the cutting head when the engine revs up; if worn or seized, it won’t transfer power.
A bent or broken drive shaft prevents power from reaching the head. Internal damage to the gearbox (located at the trimmer head end) can prevent the head from spinning.
Solution:
Inspect the clutch for signs of wear, burning, or breakage. The drive shaft should be checked for any visible damage or looseness.
The gearbox should be examined for leaks or unusual play. These issues often necessitate part replacement.
For internal components like the clutch or gearbox, professional service may be recommended due to the complexity and specialized tools often required, recognizing the limitations of DIY repairs for intricate mechanical assemblies.
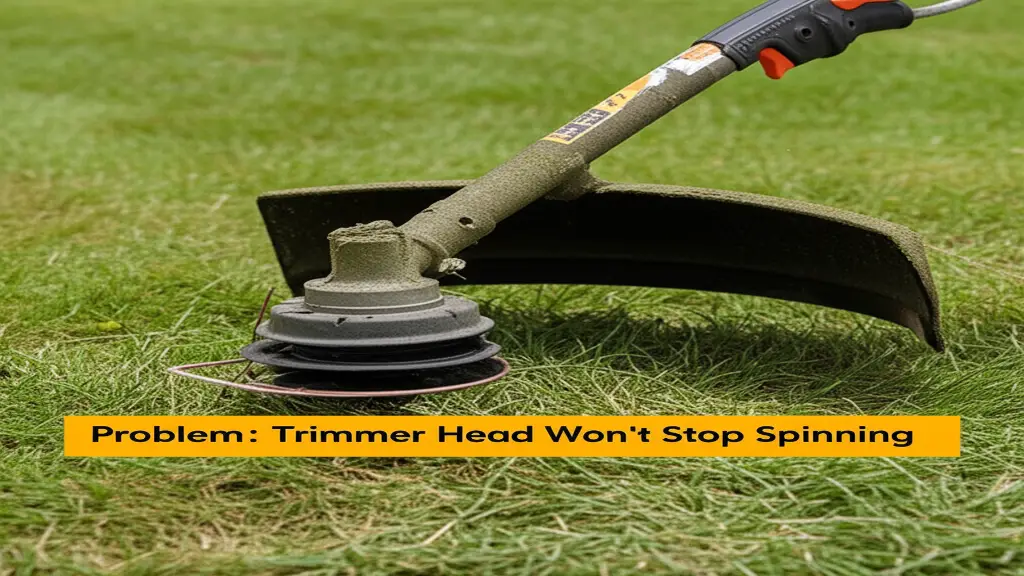 Problem: Trimmer Head Won’t Stop Spinning
Description:
The trimmer head continues to spin even at idle, indicating that the clutch is not disengaging properly. This presents a significant safety hazard.
Causes:
The clutch is constantly engaged due to sticking, worn springs, or foreign debris.
Solution:
The clutch should be inspected for sticking, worn springs, or foreign debris that might be preventing it from fully disengaging.
Cleaning the clutch assembly or replacing worn clutch springs or shoes often resolves the issue.
If the problem persists, professional inspection is strongly advised.
Problem: Husqvarna Weed Eater String Line Problems (Won’t Feed / Keeps Breaking)
 Description:
String line issues are incredibly common and often stem from how the line is installed or maintained, rather than major mechanical failure.
Many of these problems are related to user practices, highlighting the importance of correct technique and product compatibility.
Causes & Solutions:
Problem: String Line Won’t Feed
- Description: The trimmer line does not extend or feed out when bumped or manually pulled.
- Causes: The line may be incorrectly wound on the spool (over-wound or under-wound), tangled inside the head, incompatible in size, or there might be debris clogging the head, or worn spool/eyelets.
- Solution:
- Rewind/Replace Line Correctly: This is the most frequent fix. Ensure the line is wound tightly and evenly, without crisscrossing, and that each section stays in its own track. For bump feed heads, ensure the line is fed through the eyelets properly. Many Husqvarna heads allow for easy reloading without full disassembly. Proper winding saves time and reduces the consumption of trimmer line.
- Check Line Compatibility: Always use the correct gauge (diameter) and type of trimmer line specified for the Husqvarna model. An incompatible size may not fit the feeder correctly, causing binding or uneven feeding.
- Clean Trimmer Head: Remove any accumulated grass, dirt, or debris from inside and around the trimmer head that might be preventing the line from feeding freely.
- Inspect Spool/Eyelets: Examine the spool and the metal eyelets where the line exits the head for wear, cracks, or damage. Worn eyelets can fray the line and prevent smooth feeding.
Problem: String Line Keeps Breaking
Description:
The trimmer line frequently snaps or frays during operation.
Causes:
This can be due to using the wrong line size or type, improper tension during winding (either too high or too low), repeatedly hitting hard objects (rocks, concrete, fences), old or brittle line, or damage to the trimmer head itself.
Solution:
- Use Correct Line: Adhere to the manufacturer-recommended line size and type. Different line materials (e.g., round, twisted, square) offer varying durability.
- Adjust Winding Tension: Over-winding can cause the string to bind and break under excessive strain, while under-winding can lead to tangling and premature breaks. Ensure the tension is even across the entire string length. Make small adjustments and test the line’s performance.
- Mind Your Surroundings: Avoid direct contact with hard surfaces like rocks, concrete edges, or metal fences. Sudden impacts generate immense stress on the line, causing it to fray or snap.
- Fresh Line: Trimmer line can become brittle with age or exposure to extreme temperatures. Store line properly and replace old spools to ensure optimal performance.
- Inspect Trimmer Head: Regularly check the trimmer head for signs of damage or wear. Worn or damaged parts can put undue stress on the line, leading to breakage.
- Adjust Winding Tension: Over-winding can cause the string to bind and break under excessive strain, while under-winding can lead to tangling and premature breaks. Ensure the tension is even across the entire string length. Make small adjustments and test the line’s performance.
The following table summarizes common string line issues and their quick fixes, providing a scannable and actionable reference for users.
Table: Common String Line Issues & Quick Fixes
| Problem | Likely Cause(s) | Quick Fix(es) |
|---|---|---|
| String Won’t Feed | Incorrect winding (over/under), Tangled line | Rewind spool correctly, untangle line |
| Wrong line size/type, Debris in head | Use recommended line, Clean trimmer head | |
| String Keeps Breaking | High tension, Old/brittle line, Hitting hard objects | Adjust tension (not too tight), Replace old line, Avoid obstacles |
| Incompatible line, Worn head/eyelets | Use correct line size/type, Inspect/replace head components | |
| Line Jams (inside head) | Over-winding, Debris buildup | Rewind correctly, Thoroughly clean head |
Problem: Throttle Trigger Malfunctions
Description: The Husqvarna weed eater is not responding to the throttle, or the trigger feels loose or stuck.
Causes & Solutions:
Problem: Trigger Not Engaging or Stuck
- Description: The throttle trigger either doesn’t move freely, doesn’t engage the engine’s throttle, or remains stuck in a position.
- Causes: This can be due to a damaged throttle trigger assembly itself, a kinked or detached throttle cable, or a problem with the carburetor’s throttle linkage.
Solution:
Inspect Cable & Linkage:
First, check if the throttle cable moves freely when it is disconnected from the carburetor.
Also, manually move the throttle arm on the carburetor to see if it operates smoothly. Ensure the cable is correctly routed and securely attached to the carburetor’s swivel piece.
This initial check helps determine if the issue is a simple mechanical linkage problem or a more complex component failure.
Replace Throttle Trigger Assembly:
If the trigger itself is physically damaged, broken, or not engaging the throttle cable properly, it needs to be replaced.
Step-by-step Throttle Trigger Replacement:
- Ensure the engine is cool.
2. Disconnect the spark plug wire and boot.
3. Use a T-25 Torx bit to unthread the five screws holding the two halves of the throttle housing together (the clamp screw can remain intact).
4. Use a small flat-head screwdriver to carefully separate the housing halves.
5. Use a spring clamp to secure the left side of the housing, then loosen the clamp screw to pull out the upper drive shaft.
6. Detach the old trigger from the throttle cable.
7. Install the new throttle trigger by first attaching the throttle cable.
8. Insert the short end of the spring through the hole in the new trigger, ensuring the hook faces the left side.
9. Align the trigger on the mounting post and place the long end of the spring above the tension pin.
10. Insert the upper drive shaft back into the throttle housing until it locks into place.
11. Thread the mounting screw temporarily to align the shaft, then tighten the clamp screw.
12. Unthread the mounting screw and remove the spring clamp.
13. Make sure all wires and the throttle cable are secured.
14. Realign the right side of the housing and snap the two halves together.
15. Rethread and tighten the screws to secure the housing.
16. Reattach the wire and boot to the spark plug. The trimmer should now be ready for use.
Required Tools: A T-25 Torx head screwdriver and a flat-head screwdriver are necessary for this repair.
Preventative Maintenance: Keeping Your Trimmer in Top Shape
The most effective way to avoid frustrating breakdowns and extend the lifespan of a Husqvarna weed eater is through consistent preventative maintenance. A little proactive care significantly contributes to the machine’s longevity and ensures it is always ready for action.
1. Fuel Management is King: The Single Most Important Step
Proper fuel management is the cornerstone of small engine health.
- Correct Fuel Mix: For most Husqvarna 2-stroke products (up to and including 75cc), the recommended fuel-to-oil ratio is 50:1. This translates to 2.5 fluid ounces of quality 2-stroke oil per 1 gallon of unleaded gasoline.
- Ethanol-Free Gas is Best: It is highly recommended to use unleaded, ethanol-free gas for outdoor power equipment. Ethanol can attract water, degrade fuel rapidly, and corrode plastic and rubber components within the fuel system. This degradation leads to the sticky residues that cause the majority of carburetor and fuel line problems, underscoring why stale fuel is a pervasive issue leading to a cascade of common symptoms.
- Choose the Right Oil:
- Mineral Oils: These are petroleum-based and generally cost less. While they provide good lubrication, they can leave heavier carbon deposits over time, potentially leading to more maintenance.
- Full Synthetic Oils: These offer superior combustion characteristics, excellent lubrication, and burn cleaner with minimal residue, resulting in a much cleaner engine.
- Semi-Synthetic Oils: Represent a good middle ground, offering a cleaner burn than mineral oils at a lower cost than full synthetics. Husqvarna specifically recommends their premium lubricants or premixed XP+ fuel and oil for optimal performance.
- Consequences of Incorrect Mix:
- Too Much Oil: An engine with too much oil in the mix may struggle to start or run, generate excessive carbon buildup, blow clouds of smoke, and generally perform poorly.
- Too Little Oil: Conversely, too little oil can cause severe internal engine damage and overheating due to insufficient lubrication.
- Mixing Steps:
- Always use a clean, airtight container specifically designed for fuel. This prolongs the shelf life of the fuel mix and prevents permeation and evaporation.
- Begin by filling the container with half the amount of gas planned for use.
- Add the entire amount of 2-stroke oil.
- Gently shake the container to thoroughly mix the fuel and oil.
- Add the remaining amount of gas.
- Storage Tips:
- Use a separate gas can for 2-stroke mix to avoid confusion with 4-stroke fuel.
- Avoid storing mixed 2-stroke fuel for more than one month.
- For longer storage (up to 12 months), add a high-quality fuel stabilizer.
- Before seasonal storage, it is crucial to drain the fuel tank and run the trimmer until it runs out of fuel. This clears the carburetor of any remaining fuel that could degrade and cause clogs over time.
2. Regular Cleaning & Inspection: A Little Goes a Long Way
Consistent cleaning and inspection prevent minor issues from escalating into major problems.
- External Surfaces: Clean regularly (weekly for petrol models, daily for battery models) with a dry cloth.
- Air Filter: Clean every 25 hours of operation or more frequently in dusty conditions. Foam filters can be washed, while paper filters should be replaced annually or when visibly soiled or damaged.
- Spark Arrestor: Check and clean annually with a wire brush to prevent soot buildup, which can restrict exhaust flow and impact performance.
- Carburetor Area: Clean external surfaces annually to prevent dirt and debris from entering the system.
- Cooling System: Clean annually to ensure proper heat dissipation and prevent overheating.
- Fuel Filter: Check annually for clogs and replace if necessary.
- Fuel Hose: Examine annually for signs of damage or cracks.
- Spark Plug: Check annually for wear, damage, or carbon buildup; clean or replace as needed.
- Cables and Connections: Examine all cables and connections annually for wear or damage.
- Drive Shaft: Apply grease to the end of the drive shaft (for two-piece shafts) annually.
- Bevel Gear: Check the bevel gear grease weekly or monthly.
- Cutting Attachment & Guard: Inspect daily or weekly for damage, cracks, or tightness of screws and nuts. Replace if damaged to ensure safe and effective operation.
3. Seasonal Maintenance Checklist
Before storing the trimmer for the off-season, a thorough cleaning and fuel system preparation (draining fuel, running dry, adding stabilizer if desired) should be performed. All “Annual” maintenance tasks listed above should also be completed.
Table: Husqvarna Weed Eater Preventative Maintenance Schedule
| Component/Task | Frequency (Petrol Trimmers) | Frequency (Battery Trimmers) | Notes |
|---|---|---|---|
| External Surfaces Clean | Weekly | Daily | Use dry cloth, avoid water |
| Idle Speed Check | Weekly | N/A | For optimal performance |
| Bevel Gear Grease Check | Weekly | Weekly | Ensure proper lubrication |
| Starter Rope/Handle Examine | Monthly | N/A | Check for wear/damage |
| Spark Plug Check/Clean/Replace | Yearly | N/A | Inspect for wear, carbon buildup |
| Drive Shaft Grease (2-piece) | Yearly | N/A | Apply lubricant to end |
| Carburetor Area Clean | Yearly | N/A | External surfaces |
| Cooling System Clean | Yearly | N/A | Prevent overheating |
| Spark Arrestor Check/Clean | Yearly | N/A | Prevent soot buildup, rough running |
| Fuel Filter Check/Replace | Yearly | N/A | Prevent clogs from old fuel |
| Fuel Hose Examine | Yearly | N/A | Check for damage/cracks |
| Cables & Connections Examine | Yearly | N/A | Check for wear/damage |
| Cutting Attachment/Guard Check | N/A | Daily | Replace if damaged |
| Power Trigger/Lockout Check | N/A | Daily | Ensure correct function |
| Air Intake Clean | N/A | Weekly | Use compressed air |
| Battery Connections Check | N/A | Monthly | Ensure secure and clean |
Frequently Asked Questions (FAQ)
Q: Why won’t my Husqvarna weed eater start even after cleaning the carburetor? A: Even after cleaning, a carburetor issue could persist if there’s internal damage. Also, check the spark plug for a strong spark and ensure the fuel line isn’t cracked or blocked. A weak spark or fuel delivery problem will prevent starting.
Q: How often should I replace the trimmer line on my Husqvarna weed eater? A: The frequency depends on usage, but generally, replace the line when it becomes worn, brittle, or breaks frequently. Inspect it before each use and replace as needed.
Q: What type of fuel should I use in my Husqvarna weed eater? A: Always refer to your owner’s manual, but typically, a 50:1 mix of gasoline and 2-stroke engine oil is recommended. Using the correct fuel mix is crucial for engine performance and longevity.
Q: How do I know if my spark plug is bad? A: A bad spark plug may appear fouled with carbon, cracked, or have a worn electrode. You can test it with a spark plug tester to see if it’s producing a strong spark.
Q: My trimmer head is stuck. What should I do? A: Don’t force it! Try gently tapping the head against a hard surface to loosen it. If that doesn’t work, consult your owner’s manual for specific instructions on removing a stuck trimmer head.
Conclusion
Troubleshooting your Husqvarna weed eater doesn’t have to be daunting. By following these simple steps, you can quickly diagnose and fix many common problems. Remember, regular maintenance is key to preventing issues and keeping your trimmer running smoothly. Don’t hesitate to consult your owner’s manual for specific instructions related to your model. If you’re still experiencing problems, consider seeking professional repair. Now, get back to tackling those weeds and enjoying a beautifully maintained yard! If you’re having issues with other Husqvarna products, like an automower with no loop signal, we have resources to help with those too.