· Troubleshooting · 20 min read
John Deere 240 Skid Steer Problems
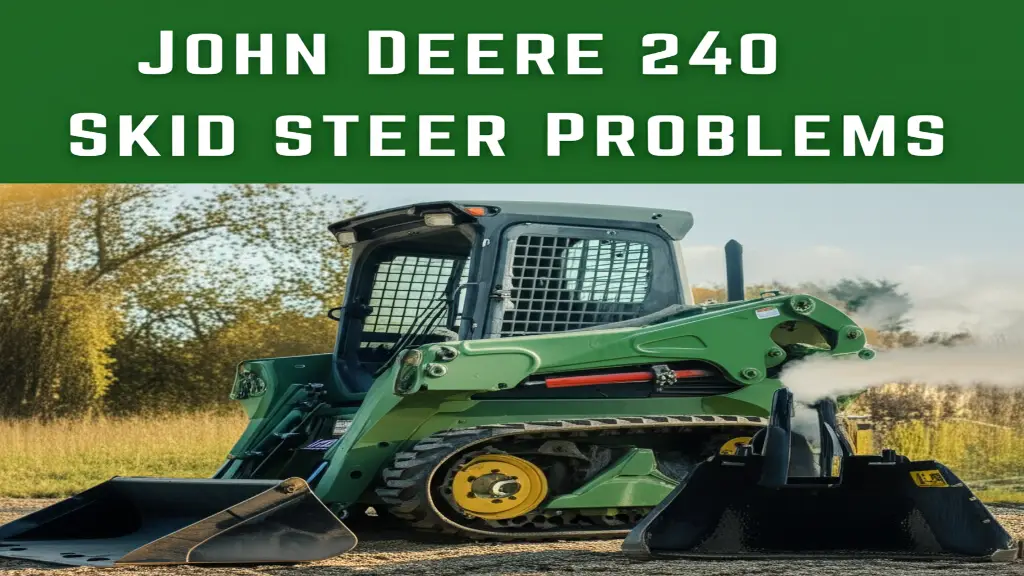
John Deere 240 Skid Steer Problems: A Comprehensive Guide
Is your John Deere 240 skid steer giving you trouble? This workhorse machine is known for its reliability, but like any equipment, it’s prone to certain issues. Addressing these problems promptly can save you time and money in the long run.
This article will dive into the most common John Deere 240 skid steer problems, offering insights into causes and potential solutions. We’ll cover everything from hydraulic system failures to engine concerns, helping you keep your machine running smoothly.
Takeaway:
- Regular maintenance is key to preventing many John Deere 240 problems.
- Hydraulic issues are common and often stem from leaks or low fluid levels.
- Engine problems can range from simple fixes like air filter replacements to more complex repairs.
- Electrical issues can be tricky to diagnose, often requiring a multimeter and wiring diagrams.
Common John Deere 240 Skid Steer Problems & Solutions
Engine issues are among the most critical problems a skid steer can face, directly impacting its ability to perform. For the John Deere 240, these often manifest as difficulties starting or a loss of power under load.
Problem: Engine Dies Under Load / Hard Starting
Description: The engine stops running when put under stress, such as when using higher gears, going up hills, or engaging the blade. It also experiences difficulty starting.
Causes:
- Plugged fuel filter
- Restricted fuel lines
- Malfunctioning fuel pump
- Clogged carburetor float that causes the engine to flood with fuel
- Loose or corroded electrical connections
- Stale or dirty fuel
- Plugged air cleaner restricting vital airflow
- Dirty and faulty injectors
- Loose or malfunctioning glow plugs (in colder environments)
- Loose throttle cable
Solutions:
- Check and replace the air filter, fuel filter, fuel lines, and fuel pump.
- Thoroughly clean the fuel tank to remove any contaminants.
- Inspect the carburetor float and its needle valve to ensure they are properly shutting off fuel flow when the bowl is full.
- Ensure all electrical connections are tight and clean.
- Verify the quality and level of the fuel itself.
- Check the glow plugs for tightness and proper function.
- Inspect the throttle cable’s attachment to ensure it’s secure.
Problem: Engine Misses / Runs Unevenly / Overheating
Description: The engine exhibits inconsistent performance, such as missing under load or running unevenly, and may also experience overheating.
Causes:
- Plugged fuel lines or filters
- Stale or dirty fuel
- Use of improper fuel
- Plugged air cleaner element
- Loose electrical connections
- For overheating: Plugged engine air intake screens, incorrect coolant mixture, clogged radiator fins, low coolant levels, loose or defective fan/alternator belt, low engine oil.
Solutions:
- Check and clean or replace fuel components and the air filter.
- Inspect and tighten all electrical connections.
- For overheating: Clean the radiator and engine air intake screens, check coolant levels and ensure the correct mixture, and inspect the fan/alternator belt for proper tension and condition.
- Ensure adequate engine oil levels.
Problem: Fuel System Issues (filters, lines, pump, carburetor)
Description: The engine dies under load, experiences hard starting, or exhibits a smokeless exhaust pipe.
Causes:
- Clogged fuel filter
- Blocked fuel lines
- Faulty fuel pump
- Issues with the carburetor float and needle valve
- Air in the oil circuit
- No oil in the tank
Solutions:
- Thoroughly check and replace all fuel system components as needed.
- Meticulously clean the fuel tank.
- Bleed air out of the system if suspected.
Engine Troubleshooting Quick Reference
| Symptom | Common Causes | Basic Fixes |
|---|---|---|
| Dies Under Load / Hard Starting | Plugged fuel filter, lines, pump; clogged carburetor float; loose/corroded electrical connections; dirty/stale fuel; plugged air cleaner; faulty injectors; loose glow plugs; loose throttle cable | Replace fuel filter, lines, pump; clean fuel tank/carburetor; check/tighten electrical connections; verify fuel quality; check glow plugs/throttle cable |
| Misses / Runs Unevenly | Plugged fuel line/filter; stale/improper fuel; plugged air cleaner; loose electrical connections | Clean/replace fuel components; clean/replace air filter; tighten electrical connections |
| Overheating | Plugged air intake screens; incorrect coolant mixture; plugged radiator fins; low coolant; loose/defective fan/alternator belt; low engine oil | Clean screens/radiator; check/refill coolant; inspect/tighten belt; check/refill engine oil |
| Smokeless Exhaust Pipe | No oil in tank; clogged fuel filter/water separator; low-pressure oil circuit not supplying oil; fuel injection pump not pumping oil; air in oil circuit | Check oil tank; clean/replace filters; inspect oil circuits; bleed air |
Troubleshooting John Deere 240 Hydraulic System Issues
The hydraulic system is the driving force behind a skid steer’s performance, enabling it to lift heavy loads, power attachments, and maneuver effectively. Its complexity and constant high-pressure operation make it a frequent area for issues.
Problem: Loss of Hydraulic Pressure / Slow Functions
Description: Implements raise or lower at sluggish rates, lack power, or generally exhibit sluggish movement and poor performance.
Causes:
- Low or contaminated hydraulic fluid (can lead to cavitation, damage internal components)
- Clogged hydraulic filters (restrict fluid flow, strain pump)
- Worn hydraulic pump or relief valve (may not generate sufficient pressure, or relief valve might be partially open)
- Plugged charge lines, suction lines, or inlet lines
- Internal leakage within the control valve or cylinders
- Overloading the boom or bucket
Solutions:
- Regularly check and maintain hydraulic fluid levels and quality.
- If fluid is dark or has visible particulates, flush the system and refill with clean, OEM-approved hydraulic oil.
- Replace clogged hydraulic filters according to manufacturer intervals or sooner if performance degrades.
- If the pump is belt-driven, inspect its belts.
- Check for low hydrostatic charge pressure.
- Verify relief valve pressure.
- Inspect and lubricate control linkage for any binding.
- Ensure the auxiliary hydraulic handle is in neutral.
Problem: Hydraulic Leaks & Contaminated Fluid
Description: Visible fluid under the machine, decreased fluid levels in the hydraulic tank, or cloudy, milky, or dark fluid.
Causes:
- Cracked hoses
- Worn seals
- Damaged gaskets or O-rings
- Loose fittings
- System-wide degradation of rubber and sealing components due to age
Solutions:
- Conduct a thorough visual inspection for fluid around hoses, fittings, the reservoir, gaskets, and cylinder seals.
- To identify elusive pinhole leaks, the system can be pressurized (with extreme caution and appropriate safety gear).
- Tighten any loose hoses or fittings.
- Replace damaged parts immediately.
- If the hydraulic fluid itself is contaminated, flush the entire system and refill with clean, OEM-approved hydraulic oil.
Problem: Boom and Bucket Movement Problems (won’t rise/tilt, creeps)
Description: The boom and bucket do not move, move slowly, jerk during operation, fail to hold position, or the skid steer creeps forward or reverse.
Causes:
- Low oil flow from the pump (due to a plugged inlet line or a worn pump)
- Low relief valve pressure
- Control linkage binding
- Bent cylinder shafts
- Leaking cylinder seals
- Bucket tilt valve spool not returning to its center position
- Auxiliary hydraulic handle locked in a detent position
- Air in the hydraulic circuit
- Pumps not neutral centered (if the skid steer creeps)
- Overloading the bucket or boom
- Damaged gear pump
- Safety interlocks (e.g., seat belt or seat switch)
Solutions:
- Check oil flow from the pump, inspect inlet lines, and consider a pump rebuild or replacement if flow is insufficient.
- Verify relief valve pressure.
- Inspect and lubricate control linkages.
- Check for bent cylinder shafts or leaking seals.
- Ensure the auxiliary hydraulic handle is in neutral and the bucket tilt valve spool returns to center.
- Remove air from the system if present.
- If the machine creeps, the pumps should be neutral centered.
- Diagnose and address any issues with safety interlocks.
Problem: Noisy Hydraulic Pump
Description: A whining sound emanating from around the hydraulic pump.
Causes:
- Insufficient fluid level
- Incorrect oil viscosity
- Presence of air in the pipeline or system
- Plugged suction line
- Clogged reservoir air vent cap
- Air leaks at pump inlet line fittings
- Damaged pump
Solutions:
- Fill the hydraulic fluid to the proper level.
- Ensure the correct oil viscosity is used; if not, replace the oil and filter.
- Inspect the suction line, reservoir air vent cap, and pump inlet line fittings for any plugs or air leaks.
- If the noise persists consistently after addressing fluid and air issues, a thorough inspection for a damaged pump is warranted.
Initial Understanding: Hydraulics as the “Backbone” and a Frequent Trouble Spot
The hydraulic system truly serves as the “backbone” of a skid steer’s performance, powering nearly all major functions. Its inherent complexity and constant operation under high pressure make it susceptible to a variety of issues, which frequently stem from fluid contamination, leaks, or general component wear. Therefore, regular inspection of both the quality and levels of hydraulic fluid is paramount to maintaining the system’s health and preventing major failures.
Navigating John Deere 240 Electrical Malfunctions
Electrical issues in heavy equipment can be particularly challenging to diagnose due to the interconnectedness of various components. For the John Deere 240, these problems often manifest in starting difficulties, safety interlock failures, and erratic gauge behavior.
Problem: Starting System Failures (starter, battery, alternator)
Description: The starter does not work or turns slowly, the battery fails to charge, or the battery discharge indicator light remains on while the engine is running.
Causes:
- Dead, low charge, low output, or dead cell battery
- Dirty battery cables or corroded terminals
- Loose connections at the starter or relay
- Faulty starter unit
- Blown fuses
- Low or no alternator output
- Loose or damaged fan/alternator belt
- General wiring issues, including loose or corroded electrical connections
- Bad ignition switch
Solutions:
- Check battery terminals for corrosion and ensure tight connections at the starter and relay.
- Test the battery’s charge and output, and replace it if a dead cell is found.
- Inspect and replace any blown fuses.
- Check the fan/alternator belt tension and condition, and test the alternator output.
- Inspect all wiring connections for signs of wear, looseness, or corrosion, cleaning any corroded terminals.
Problem: Safety Interlock & Seat Belt Light Issues
Description: The bucket lock turns on unexpectedly, the seat belt light illuminates even when buckled, the boom and bucket refuse to move, and the park brake fails to unlock.
Causes:
- Intermittent seat belt buckle switch
- Seat switch not activated or improperly sequenced
- Loss of ground from the dashboard relay
- No power to the solenoid on the port lock
- Faulty sensors or switches within the broader control system
Solutions:
- Repeatedly buckle and unbuckle the seat belt as a temporary measure.
- For diagnostic purposes, the seatbelt switch can be bypassed (with extreme caution due to safety implications).
- Check all ground wires, especially those from the battery and chassis to relays.
- Ensure the seat belt and seat switches are activated and sequenced correctly.
- Verify power at the solenoid on the port lock and its ground connection.
- Use diagnostic tools to test and replace any faulty sensors or switches.
Problem: Flickering Gauges & Intermittent Power Loss
Description: Gauges, such as the voltage meter, fluctuate between red and green, or there is a dead instrument cluster and intermittent power loss to the panel.
Causes:
- Loose or corroded ground connections
- Too small gauge wire or poorly crimped connectors (leading to excessive heat and damage)
- Corroded battery cables
- Faulty gauge cluster or instrument panel
- Loose or corroded wiring connections elsewhere in the electrical system
Solutions:
- Check and “massage” all ground connections, particularly those from the battery and chassis.
- Inspect all connectors, and replace those with bad crimps or corrosion with new, correctly gauged, and properly crimped or soldered connectors.
- Check battery cables for corrosion.
- If other electrical checks fail, a professional repair service for the gauge cluster may be necessary.
- Regularly inspect wiring harnesses and connectors for wear, looseness, or corrosion.
Problem: Wiring & Connection Problems
Description: Intermittent power loss, non-functional controls, and erratic machine behavior.
Causes:
- Vibrations and environmental exposure (can loosen connections or cause corrosion)
- Use of incorrect gauge wire or poor crimps during previous repairs
Solutions:
- Regularly check wiring harnesses and connectors for signs of wear, looseness, or corrosion.
- Clean any corroded terminals.
- Tighten all connections to maintain consistent electrical flow.
- Replace damaged wiring or connectors with appropriate gauge wires.
Initial Understanding: Electrical Issues Often Stem from Simple Connection Problems
Many frustrating electrical issues on the John Deere 240, from starting troubles to safety interlock glitches, frequently trace back to surprisingly simple culprits: loose, dirty, or corroded wiring connections and grounds. A thorough inspection of these points can often resolve complex-seeming problems, highlighting the importance of basic electrical hygiene.
John Deere 240 Parking Brake & Safety Interlock Problems
The parking brake and safety interlock systems are crucial for both the operational safety and the proper functioning of the John Deere 240 skid steer. Issues with these systems can prevent the machine from operating or create hazardous conditions.
Problem: Park Brake Won’t Unlock/Lock
Description: The parking brake remains engaged when it should be released, or conversely, fails to engage when desired.
Causes:
- Seat belt or seat switch not activated (interlock)
- Park brake switch not registering its momentary down position (for unlock) or its up position (for lock)
- Malfunction of the park brake system or the switch itself
- Blown fuse (e.g., a 30 amp fuse)
- Physical damage to the switch (e.g., a broken plastic piece or internal mechanism)
Solutions:
- Ensure the seat belt is buckled and the seat switch is properly activated.
- Firmly push the park brake switch down (for unlock) or up (for lock).
- Check the relevant fuse (e.g., a 30 amp fuse) and replace it if blown.
- Inspect the physical park brake switch for any breakage or internal damage; repair if possible.
- If these steps do not resolve the issue, it may indicate a deeper malfunction of the park brake system or switch, which often warrants professional attention.
Problem: Driving Through Locked Park Brake
Description: The machine moves even with the park brake switch in the locked position.
Causes:
- Malfunction within the park brake system or the park brake switch itself.
Solutions:
- Conduct a thorough inspection of the park brake system and its switch for internal malfunction.
- Due to the critical safety implications, professional diagnosis and repair are strongly recommended.
Problem: Interplay with Seat/Seatbelt Switches
Description: The seat belt light stays on even when buckled, the boom lock engages unexpectedly, or the machine refuses to move, including the park brake not unlocking.
Causes:
- Intermittent or faulty seat belt buckle or seat switches
- Loss of ground to the dashboard relay
Solutions:
- Check and clean the seat belt buckle.
- Inspect the seat switch.
- Verify all ground connections. (Note: Bypassing these switches compromises the machine’s safety features).
Initial Understanding: These are Critical Safety Features, Often Misunderstood
The John Deere 240’s parking brake and safety interlocks are not merely operational controls but vital safety mechanisms. Issues with these systems, particularly the seat belt and seat switches, can prevent machine operation entirely. Understanding their interconnectedness and purpose is crucial for both effective troubleshooting and ensuring safe operation of the equipment.
Steering Clear of John Deere 240 Steering System Headaches
Effective steering is paramount for the safe and efficient operation of any skid steer. For the John Deere 240, steering problems can range from simple linkage adjustments to more complex issues within the hydraulic pump or control system.
Problem: Faulty Steering & Linkage Adjustments
Description: The machine does not turn correctly, drives unevenly (with one side moving faster than the other), or the steering clutch pedal is slow to disengage.
Causes:
- Steering linkage adjustment problems
- Broader problems within the skid steer loader’s control system (including loose connections or faulty safety switches)
- Low hydraulic oil
- Stripped pump housing due to missing or broken bolts
Solutions:
- Attempt to loosen bolts and shorten the linkage to adjust steering.
- Check all connections and wires in the control system for tightness.
- Examine safety switches for any malfunctions.
- Verify hydraulic oil levels.
- Inspect the pump housing for any missing bolts or stripped threads.
Problem: Pump Housing & Centering Plate Issues
Description: The machine exhibits uneven driving and difficulty steering.
Causes:
- Stripped pump housing resulting from broken or missing bolts
- Swash plate in the pump becoming locked up
- Centering plate adjustment issues
Solutions:
- Inspect the pump housing for missing bolts and stripped threads, attempting to replace any missing bolts.
- Check if the swash plate in the pump is locked up.
- For centering plate issues, it is advisable to obtain the specific adjustment specifications from John Deere to ensure proper calibration.
Initial Understanding: Steering Problems Can Be Complex, Sometimes Requiring Professional Adjustment
While some steering issues on the John Deere 240 might be resolved with straightforward linkage adjustments, many can point to deeper, more complex problems within the hydraulic pump or the machine’s control system. Given the significant safety implications of faulty steering, professional diagnosis and repair are often recommended to ensure the machine operates safely and effectively.
Proactive Maintenance: Extending Your John Deere 240’s Lifespan
Consistent and proactive maintenance is the single most effective strategy for extending the lifespan of a John Deere 240 skid steer, minimizing downtime, and preventing costly repairs. Adhering to a regular maintenance schedule allows operators to catch minor issues before they escalate into major problems.
Daily Maintenance Checks
Daily maintenance checks are the first line of defense in preserving the health and performance of a John Deere 240. These quick inspections can prevent small issues from escalating into significant problems.
Key daily tasks include:
- Inspecting fluid levels for engine oil, hydraulic fluid, and coolant. Low fluid levels can rapidly lead to serious mechanical issues if not addressed promptly.
- Checking and cleaning the air filter. A clean air filter ensures proper engine breathing and prevents contamination.
- Cleaning debris from the undercarriage, engine bay, radiator, and air intakes. This prevents overheating and airflow restriction.
- Examining tires or tracks for signs of wear, damage, or improper inflation/tension. Addressing these early helps avoid traction loss or drive problems.
- Checking for leaks or loose fittings around hydraulic lines, fuel lines, and connectors. This helps identify fluid seepage that could indicate a larger issue.
- Greasing and lubricating any daily lubrication points specified in the Operator’s Manual.
The consistent emphasis on daily visual inspections and fluid checks transforms routine maintenance into a proactive diagnostic tool. By regularly “walking around” the machine, operators can spot early signs of leaks, wear, or debris accumulation before they lead to significant problems, effectively catching “minor issues before they develop further”.
Scheduled Service Intervals (50-hour, 100-hour, 500-hour)
Beyond daily checks, adhering to manufacturer-recommended scheduled service intervals is crucial for long-term machine health. These intervals are designed to address wear and tear before it becomes critical, ensuring component longevity and system efficiency.
- 50-Hour Checklist: This interval includes checking engine oil, hydraulic oil, and brake fluid levels; cleaning the air filter housing dust valve; checking the condition of the V-belt and tightening if necessary; inspecting engine oil and hydraulic oil coolers for contamination; and lubricating bearings in the driveshaft, steering cylinder, articulation joint, lift arm linkage, tilt lever, lift cylinder, tilt cylinder, quick-hitch, and all hinges.
- 100-Hour Checklist: This comprehensive service involves a full, multi-point inspection; changing the engine oil and oil filter, fuel filter, and hydraulic oil filter insert; checking and replacing brake pads if necessary; and includes all tasks from the 50-hour maintenance checklist.
- 500-Hour Checklist: At this interval, a full, multi-point inspection is performed; the air filter insert is replaced; axle oils are changed; and all items from the 50-hour maintenance checklist are included.
These structured maintenance schedules are essentially a form of predictive maintenance. They are designed by the manufacturer to anticipate common wear points and fluid degradation based on typical usage cycles. Adhering to these schedules is not just about “fixing things”; it is about proactively replacing components or fluids before they fail, thereby preventing unexpected breakdowns and maximizing uptime. Following these intervals can significantly save money on costly, unplanned repairs.
Preventing Corrosion & Wear
Corrosion and general wear are inevitable consequences of operating heavy machinery, but proactive measures can significantly mitigate their impact.
Corrosion:
- Symptoms: Corrosion initially appears as rust on the exterior but can lead to the deterioration of essential machine parts, including engine components, rubber seals, and hoses.
- Causes: The primary causes are exposure to harsh environmental elements such as snow, road salt, and fertilizer.
- Prevention: To prevent corrosion, it is vital to monitor the machine closely when operating in harsh conditions. Regular cleaning of the equipment is essential to prevent debris accumulation, and the use of corrosion inhibitors on the machinery can provide an added layer of protection. The specific mention of “snow, road salt, and fertilizer” as corrosion catalysts highlights that the operating environment imposes a “tax” on equipment longevity. This means maintenance is not a one-size-all approach; machines in harsh, corrosive environments require more frequent and diligent cleaning and protective measures than those in milder conditions, suggesting a need for adaptive maintenance strategies.
General Wear:
- Focus Areas: Key areas for general wear include the undercarriage, tires or tracks, axle seals, and booms.
- Prevention: Regular cleaning, monitoring fluid levels (especially for the final drive), lubricating gears, inspecting booms for cracks, bends, or rust, and checking tire tread and pressure are all crucial preventative measures.
John Deere 240 Maintenance Checklist
| Task | Frequency | Importance/Why |
|---|---|---|
| Check engine oil, hydraulic oil, coolant levels | Daily | Prevents major mechanical issues from low fluid; ensures proper lubrication and cooling. |
| Check/clean air filter | Daily | Ensures proper engine breathing; prevents contamination. |
| Clean debris from undercarriage, engine bay, radiator, air intakes | Daily | Prevents overheating; avoids airflow restriction; reduces wear. |
| Examine tires/tracks for wear, damage, inflation/tension | Daily | Prevents traction loss; ensures stability and proper drive. |
| Check for leaks or loose fittings (hydraulic, fuel lines, connectors) | Daily | Identifies fluid seepage early; prevents pressure loss and component damage. |
| Grease/lubricate daily points | Daily | Reduces friction and wear on moving parts; extends component life. |
| Check V-belt condition & tighten | 50 Hours | Ensures proper power transfer to components like alternator and fan. |
| Clean air filter housing dust valve | 50 Hours | Maintains air filter efficiency. |
| Check engine/hydraulic oil coolers for contamination | 50 Hours | Ensures efficient cooling; prevents system overheating. |
| Lubricate various bearings and joints (driveshaft, steering, lift arm, etc.) | 50 Hours | Reduces wear; ensures smooth operation of linkages and cylinders. |
| Full, multi-point inspection | 100 Hours, 500 Hours | Comprehensive assessment of machine health; identifies potential issues early. |
| Change engine oil & oil filter | 100 Hours | Maintains engine lubrication quality; prevents internal wear. |
| Change fuel filter | 100 Hours | Ensures clean fuel delivery; prevents engine performance issues. |
| Change hydraulic oil filter insert | 100 Hours | Maintains hydraulic fluid cleanliness; protects hydraulic components. |
| Check & replace brake pads (if necessary) | 100 Hours | Ensures effective braking and safety. |
| Replace air filter insert | 500 Hours | Ensures optimal engine performance and longevity. |
| Change axle oils | 500 Hours | Maintains proper lubrication of axles; prevents drive system wear. |
FAQs
Q1: What are the most common problems with John Deere 240 skid steers?
The John Deere 240 commonly experiences engine issues (dying under load, hard starting), hydraulic system malfunctions (leaks, slow functions, boom/bucket problems), electrical issues (starting, safety interlocks, flickering gauges), and parking brake failures. These are often related to wear and tear, fluid levels, filter condition, and electrical connections.
Q2: How many hours is a lot for a John Deere 240 skid steer?
On average, a John Deere skid steer like the 240 (around 51 hp) is expected to provide about 5,000 hours of use before significant mechanical problems arise. However, with diligent maintenance and proper operation, many machines can exceed this lifespan, offering reliable performance for many more hours.
Q3: Why won’t my John Deere 240 skid steer’s boom or bucket move?
This is often due to safety interlocks like the seat belt or seat switch not being activated or properly sequenced. Other causes include low hydraulic oil flow, low relief valve pressure, control linkage binding, or an overloaded boom/bucket. Always check safety interlocks first.
Q4: What causes electrical problems in a John Deere 240 skid steer?
Common electrical issues stem from loose or corroded wiring connections, faulty sensors or switches, and problems with the battery, starter, or alternator. Vibrations and environmental exposure can also degrade connections over time, leading to intermittent power loss or non-functional controls.
Q5: How can I troubleshoot a John Deere 240 skid steer that dies under load?
This typically points to fuel system issues. Check and replace the air filter, fuel filter, fuel lines, and fuel pump. Thoroughly clean the fuel tank and inspect the carburetor float and needle valve for proper fuel shut-off. Ensure fuel quality is good and electrical connections are secure.
Q6: What maintenance is recommended for a John Deere 240 skid steer?
Regular maintenance is crucial. Daily checks include fluid levels, air filter, and debris removal. Scheduled maintenance (50, 100, 500 hours) involves changing engine and hydraulic oils/filters, checking belts, lubricating joints, and comprehensive inspections. This proactive approach significantly extends the machine’s lifespan.
Q7: Can I lift the boom on my John Deere 240 if the starter isn’t working?
Yes, it is possible to lift the boom externally even if the starter is not working. One method involves connecting a hydraulic hose from another vehicle with a hydraulic system (like a tractor) to the skid steer’s lift hoses, after carefully removing the skid steer’s hoses to allow pressure venting.
Final Words
The John Deere 240 skid steer is a robust machine, but understanding its common problems and implementing proactive maintenance is paramount for long-term reliability.
From engine hiccups to hydraulic woes and electrical glitches, many issues can be diagnosed and addressed with the right knowledge and tools.
Regular fluid checks, filter replacements, and diligent inspection of electrical connections are the best defense against unexpected downtime.
Do not wait for a problem to escalate; consult the owner’s manual, seek professional advice when needed, and stay proactive to keep the John Deere 240 performing at its best.

