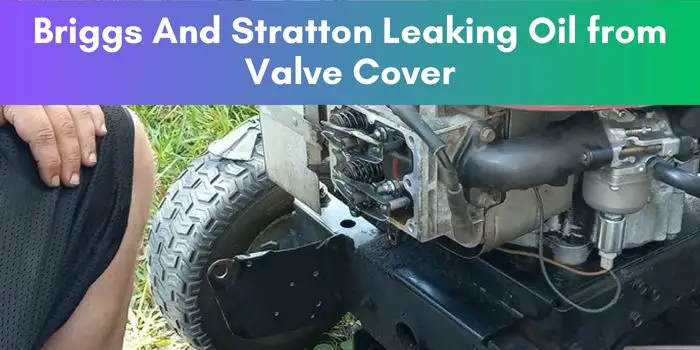
Briggs And Stratton Leaking Oil from Valve Cover : Fix It Now
Briggs and Stratton leaking oil from the valve cover may indicate a problem with the gasket or seal, which will need to be replaced. Briggs and Stratton engines may experience oil leaks from the valve cover due to faulty gaskets or seals.
If you notice oil pooling around the valve cover, it is essential to address the issue promptly to prevent further damage to the engine. We will explore the potential causes of oil leaks from the valve cover and provide steps to fix the problem.
By following these guidelines, you can ensure the longevity and optimal performance of your Briggs and Stratton engine.
Understanding How The Valve Cover Works In Briggs And Stratton Engines
The valve cover on a Briggs & Stratton engine might seem like a simple piece of metal, but it plays a surprisingly important role in keeping your engine running smoothly and efficiently. Let’s break down what it does and why it matters.
What is a Valve Cover?
- Housing and Protection: The valve cover is essentially a lid that sits atop the engine’s cylinder head. Its primary function is to protect vital internal engine components: the valves, valve springs, rocker arms, and often the pushrods.
- Sealing Surface: The valve cover contains a gasket that forms a tight seal against the cylinder head. This seal is crucial for preventing oil leaks.
- Breather: Many valve covers have an integrated breather, a component that helps regulate crankcase pressure.
How the Valve Cover Relates to Engine Function
- Lubrication: Inside the valve cover area, engine oil is splashed, sprayed, or directed onto moving parts like the rockers and valve stems. This is essential for lubrication, which reduces wear and tear.
- Crankcase Pressure: The engine produces crankcase pressure from the piston movement and combustion gases that enter the crankcase. The breather allows these gases to vent in a controlled manner, preventing pressure buildup and potential gasket or seal leaks.
- Cleanliness: The sealed environment created by the valve cover helps keep dirt and debris out of the valve train, enhancing the components’ lifespan.
Signs of Valve Cover Issues
- Oil Leaks: Oil stains or drips around the edge of the valve cover could indicate a failing gasket or a warped cover.
- Smoke/Fumes: Blueish smoke or oil fumes emerging from under the valve cover can point to excess crankcase pressure or oil leaks burning on hot engine components.
- Noise: Excessive clattering coming from the top of the engine might point to insufficient lubrication due to a leaking gasket or a clogged ventilation system.
Common Causes Of Oil Leakage From The Valve Cover:
Oil leakage from the valve cover can occur due to various reasons. Some of the common causes include:
- Aging gaskets: Over time, gaskets can deteriorate or lose their flexibility, leading to cracks or gaps that allow oil to escape.
- Incorrect installation: Improper installation of the valve cover or gaskets can result in a faulty seal, causing oil leakage.
- Loose screws or bolts: If the fasteners securing the valve cover are not properly tightened, it can result in a loose fit, leading to oil leaks.
- Excessive oil pressure: A sudden increase in oil pressure, often caused by a clogged oil passage or malfunctioning oil pump, can cause leaks from the valve cover.
- Engine overheating: Continuous exposure to high temperatures can cause the valve cover gaskets to warp or become brittle, resulting in oil leakage.
Importance Of Fixing The Issue Promptly:
Addressing oil leakage issues from the valve cover promptly is crucial for several reasons:
- Prevent engine damage: Oil is vital for lubricating engine components, and any leakage can lead to insufficient lubrication, causing parts to wear out faster and potentially resulting in severe engine damage.
- Maintain engine performance: Oil leaks can lead to decreased oil levels, affecting the engine’s overall performance, including reduced power, increased fuel consumption, and decreased efficiency.
- Prevent safety hazards: Oil leakage can result in oily surfaces, creating a hazardous environment that increases the risk of accidents, especially if the oil comes into contact with hot engine parts.
- Cost-effective solution: Fixing valve cover oil leaks early can help prevent further damage and the need for more extensive repairs, saving both time and money in the long run.
Signs And Symptoms Of Briggs And Stratton Leaking Oil From Valve Cover
Briggs and Stratton leaking oil from valve cover can be indicated by visible oil stains, a burning oil smell, or low oil levels in the engine.
A leaky valve cover on your Briggs & Stratton engine can cause headaches – from messy oil stains to potential engine performance issues. While it might seem like a minor problem, a persistent leak can point to bigger issues. Let’s explore some telltale signs to help you diagnose this common ailment.
Symptoms: How to Spot the Problem
- The Obvious – Oil Stains and Drips: Look for visible oil streaks, stains, or even puddles around the base of your engine where the valve cover sits on the cylinder head. Fresh oil is easier to spot, so check the area after running the engine for a while.
- Burning Oil Smell: When oil leaks onto hot engine parts like the exhaust, it creates a distinct burnt oil smell. This smell might be intermittent, becoming more noticeable as the engine heats up
- Blue-ish Smoke: In more severe cases, a leaky valve cover can allow oil to seep into the combustion chamber, resulting in a blue-ish smoke from the exhaust.
- Low Engine Oil Level: Frequent oil top-ups might be a telltale sign of a leak, with the valve cover being one of the possible culprits.
Why Does a Valve Cover Leak?
Here are some common causes:
- Worn Gasket: The gasket between the valve cover and the cylinder head creates the seal. Over time, heat and age can cause this gasket to harden, crack, or deteriorate, compromising its sealing ability.
- Warped Valve Cover: Metal expansion and contraction from extreme heat cycles can cause the valve cover to warp, creating gaps and leading to leaks.
- Loose Fasteners: If the valve cover bolts or nuts become loose, they can’t provide the necessary clamping pressure to maintain a proper seal.
- Excess Crankcase Pressure: A clogged breather system can increase pressure in the crankcase, pushing oil past the gasket and causing leaks.
- Excessive oil consumption: If you notice that your engine requires frequent oil top-ups or is burning through oil at a faster rate, it may be a sign of a valve cover oil leak. This indicates that oil is escaping from the valve cover and not lubricating your engine effectively.
- Visible oil leaks around the valve cover area: A clear indication of a valve cover oil leak is the presence of visible oil around the valve cover area. These leaks can often be seen as puddles or stains on the engine or ground beneath it. Inspect the valve cover for any signs of damage or loose bolts that may be causing the leak.
- Smoke or burning smell from the engine: An oil leak from the valve cover can sometimes result in smoke or a burning smell coming from the engine. This occurs when the leaking oil drips onto hot engine components and starts to burn. If you notice any unusual smoke or smells emanating from your engine, it’s important to investigate the issue promptly.
Taking proactive measures will ensure the longevity and optimal performance of your Briggs and Stratton engine.
Step-By-Step Guide To Fixing The Oil Leakage Issue
Here’s a step-by-step guide to fixing the Briggs & Stratton oil leakage issue, specifically when the leak originates from the valve cover area:
Before You Begin
- Gather your tools:
- Socket set with appropriate sizes
- Torque wrench
- Scraper or putty knife
- Degreaser/cleaning solution
- Safety glasses
- Gloves
- New valve cover gasket (ensure you have the correct part for your engine model)
- Replacement parts (any other damaged or worn components you find during inspection)
Step-by-Step Guide
- Locate the leak source: Clean the area around the valve cover thoroughly with degreaser. Run the engine briefly and observe for fresh oil leaks to confirm the valve cover area is the problem.
- Disconnect the spark plug wire: Remove the spark plug wire(s) to prevent accidental starting while working on the engine.
- Remove any obstructions: Disconnect any hoses, wiring harnesses, or components blocking access to the valve cover.
- Remove the valve cover: Carefully loosen and remove the valve cover bolts or nuts. With the bolts removed, gently lift off the valve cover.
- Inspect the gasket and mounting surfaces:
- Carefully remove the old gasket, examining it for cracks, breaks, or hardening.
- Clean both the valve cover and cylinder head mating surfaces using a scraper and degreaser. Ensure all traces of old gasket material and oil are removed.
- Check for any warping of the valve cover that could prevent a proper seal.
- Install the new gasket: Place the new gasket carefully onto the cylinder head. Ensure it aligns properly.
- Reinstall the valve cover: Position the valve cover over the new gasket. Install the bolts or nuts and tighten them in a crisscross pattern to the torque specifications listed in your owner’s manual.
- Reconnect components: Reinstall any hoses, wires, or other components you previously disconnected.
- Reconnect the spark plug wire: Securely reattach the spark plug wire(s).
- Check oil level: Top up the oil level if necessary, using the type specified in your manual.
- Start and monitor: Start the engine and carefully check for any fresh leaks around the valve cover. Let the engine run for a few minutes and re-inspect.
Inspecting The Valve Cover And Gaskets:
Inspecting the valve cover and gaskets is the first step in addressing the oil leakage issue. By visually examining these components, you can identify any visible damage or leaks that may be causing the problem.
Here’s what you need to do:
- Tools required for inspection: Before starting the inspection, gather the necessary tools, including a socket wrench set, a flat-head screwdriver, a shop towel, and a flashlight.
- Steps to visually inspect the valve cover and gaskets: Follow these steps to visually inspect the valve cover and gaskets:
- Remove any debris or dirt from the engine’s exterior to get a clear view.
- Begin by locating the valve cover. It’s usually a metallic or plastic housing located on top of the engine.
- Inspect the valve cover for any signs of oil leakage, such as visible oil stains or drips.
- Carefully examine the gasket that sits between the valve cover and the engine block. Look for any signs of wear, cracks, or damage.
Replacing The Valve Cover Gasket:
If you’ve identified a damaged or worn-out valve cover gasket during the inspection, replacing it is necessary to fix the oil leakage.
Follow these steps to replace the valve cover gasket:
Steps to safely remove the valve cover:
- Start by disconnecting the spark plug wire to ensure the engine is not accidentally started during the process.
- Use a socket wrench to loosen and remove the bolts securing the valve cover in place.
- Gently pry off the valve cover with a flat-head screwdriver, being careful not to damage the surrounding components.
Selecting the correct replacement gasket:
- Refer to your Briggs and Stratton engine’s model number to find the correct replacement gasket. It’s crucial to get the right one to ensure a proper fit and prevent future oil leaks.
Proper installation of the new gasket:
- Clean the valve cover and the engine block surface thoroughly to remove any dirt, oil, or debris.
- Place the new gasket onto the valve cover, ensuring that it aligns correctly with the screw holes.
- Carefully position the valve cover back onto the engine block and secure it with the bolts, tightening them gradually and evenly.
Tips for ensuring a leak-free seal:
- Double-check that the gasket is properly aligned and seated before tightening the bolts.
- Torque the bolts to the manufacturer’s specifications to avoid over-tightening or under-tightening.
- Regularly inspect the valve cover and gasket for any signs of leakage after installation to catch potential issues early on.
Repairing Or Replacing The Valve Cover:
In some cases, the valve cover itself may be damaged, leading to oil leakage. Here’s how you can address this issue:
Assessing the condition of the valve cover:
- Inspect the valve cover for any cracks, warping, or other signs of damage that could be causing oil leaks.
Steps for repairing minor damage:
- If you notice minor damage, you may be able to repair it using epoxy or a similar adhesive. Follow the product instructions carefully.
Options for replacement if necessary:
- If the valve cover is severely damaged or cannot be repaired, it’s best to replace it entirely. Refer to your engine’s model number to find the correct replacement valve cover.
Proper installation of the valve cover:
- Clean the engine block surface and ensure it is free of debris or oil before installing the new valve cover.
- Carefully place the new valve cover onto the engine block, aligning it with the screw holes.
- Secure the valve cover with the bolts, tightening them gradually and evenly.
Regular maintenance and inspections can help prevent future leaks, ensuring optimal engine performance and longevity.
Preventive Maintenance Tips To Avoid Valve Cover Leaks In The Future
Here are some preventive maintenance tips to minimize the chances of future valve cover leaks on your Briggs & Stratton engine:
- Regular Gasket Replacement: Consult your owner’s manual and replace the valve cover gasket at the recommended intervals, even if there are no immediate signs of leaks. Gaskets degrade over time, so proactive replacement is key.
- Proper Torque Specifications: Always use a torque wrench when reinstalling the valve cover bolts or nuts. Overtightening can distort the cover or damage the gasket, while under-tightening won’t create a proper seal.
- Monitor Crankcase Pressure: Ensure your breather system is functioning correctly. A clogged breather can lead to increased crankcase pressure, putting added stress on seals and gaskets.
- Regular Oil Changes: Use the recommended oil type and viscosity for your engine model. Change the oil at specified intervals to prevent sludge buildup which can clog the breather system.
- Visual Inspections: Regularly check the valve cover area for any early signs of oil leakage. Catching a minor leak early can prevent it from becoming a major issue.
- Address Overheating Issues: If your engine is prone to overheating, tackle the underlying cause. Excessive heat cycles can weaken gaskets and potentially warp the valve cover.
Additional Tips:
- Clean Engine: Keeping your engine clean makes it easier to spot potential leaks early on.
- Quality Parts: Always use genuine Briggs & Stratton gaskets and replacement parts for the best fit and quality.
- Storage: If storing your engine for extended periods, follow the recommendations in your owner’s manual to avoid gasket drying or deterioration.
Preventive Maintenance Tips To Avoid Valve Cover Leaks In The Future
Regular inspection and maintenance of the valve cover and gaskets:
- Check the valve cover and gaskets regularly for signs of wear, cracks, or damage.
- Look for oil spots or leaks around the valve cover area.
- Clean the valve cover and surrounding area to ensure proper inspection.
Importance of using high-quality gaskets and sealants:
- Invest in high-quality gaskets and sealants specifically designed for your Briggs and Stratton engine.
- These products provide a tight seal, preventing oil from leaking out of the valve cover.
- High-quality gaskets and sealants are durable and can withstand the heat and pressure of the engine.
Proper torque specifications for valve cover bolts:
- Ensure that the valve cover bolts are properly torqued to the manufacturer’s specifications.
- Use a torque wrench to tighten the bolts to the recommended level.
- Incorrect torque can lead to leaks and other problems with the valve cover.
Regular oil changes and monitoring oil levels:
- Follow the recommended oil change intervals specified in your Briggs and Stratton engine manual.
- Regular oil changes help maintain the proper oil level and prevent oil leaks.
- Monitor the oil level regularly and top up if necessary.
Avoiding overfilling the engine with oil:
- Overfilling the engine with oil can cause excess pressure, leading to leaks.
- Follow the manufacturer’s recommendations on the proper oil level.
- Use the dipstick to check the oil level and add oil if needed, but do not overfill.
Why is there oil coming out of my valve cover breather?
Here’s a breakdown of common causes and what to do:
1. Excess Crankcase Pressure
- The Issue: Pistons moving and combustion gases create pressure inside the crankcase. If this pressure isn’t vented properly, it can force oil out of any weak points, including the valve cover breather.
- Possible Causes:
- A clogged breather system (breather tube, filter, or PCV valve)
- Worn piston rings allowing excessive blow-by (combustion gases leaking past the rings into the crankcase)
- How to Check: Look for other signs of high crankcase pressure, like leaks from other seals or gaskets.
2. Overfilled Oil
- The Issue: Too much oil in the engine increases splashing within the crankcase and can push oil mist up through the breather.
- How to Check: Verify the oil level is within the correct range on your dipstick.
- Solution: Drain excess oil if overfilled.
3. Worn Valve Guides or Seals
- The Issue: These components control the flow of oil around the valves. When worn, they can allow excessive oil to drain into the combustion chamber and get forced into the breather.
- How to Check: Watch for blueish exhaust smoke, especially on startup or deceleration, as this can indicate burning oil.
- Solution: This usually requires professional engine work to replace the worn parts.
4. Engine Wear or Damage
- The Issue: In extremely worn engines, loose tolerances and damaged components can lead to greater oil blow-by and crankcase pressure issues.
- How to Check: These scenarios often have multiple symptoms like engine noise, poor performance, and overall oil consumption.
- Solution: Significant engine repair or replacement might be needed.
Important Notes
- Small Amounts: It’s normal for a tiny bit of oil mist to escape the breather, especially on older engines.
- Consult Your Manual: Refer to your owner’s manual for specific troubleshooting instructions and recommendations for your engine.
- Don’t Ignore the Issue: Oil continuously coming out of the breather indicates a problem that should be addressed to prevent engine damage.
Frequently Asked Questions
Why Is My Briggs And Stratton Engine Leaking Oil From The Valve Cover?
Leaking oil from the valve cover of a Briggs and Stratton engine can be caused by a worn gasket, damaged valve cover, or overfilled oil. It is important to check the gasket and valve cover for any signs of wear or damage, and ensure the oil is at the correct level.
Conclusion
To sum up, if you notice oil leaking from the valve cover of your Briggs and Stratton engine, it is important to address the issue promptly. The valve cover serves a crucial role in preventing oil leaks and maintaining the proper functioning of the engine.
By following the steps outlined in this blog post, including inspecting and cleaning the valve cover, tightening the bolts, and replacing the gasket if necessary, you can effectively resolve the issue. Regular maintenance and careful observation are key to ensuring the longevity and performance of your Briggs and Stratton engine.
By staying vigilant and taking action when oil leaks occur, you can prevent further damage and keep your engine running smoothly for years to come. Don’t ignore the signs of oil leaks; tackle the problem head-on and enjoy a leak-free engine.