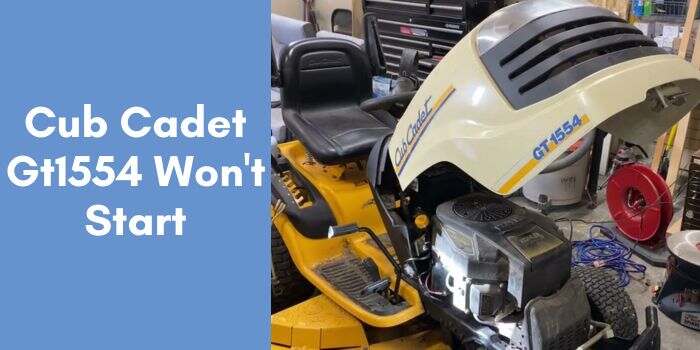

Cub Cadet Carburetor Problems: Expert Fixes & Tips
Cub Cadet carburetor problems can cause engine performance issues and should be addressed promptly.
A well-functioning carburetor is essential for the optimal performance of your Cub Cadet mower or outdoor power equipment.
The carburetor is responsible for mixing fuel and air to create a combustible mixture that powers the engine. Over time, carburetors can develop issues that can affect engine performance.
Some common problems include clogged jets, a stuck float, or a dirty air filter. These issues can result in poor starting, rough idling, or sluggish acceleration.
Here’s a comprehensive guide on troubleshooting and fixing these problems to keep your Cub Cadet in top shape.
Common Signs Of Carburetor Problems
A properly functioning carburetor is essential for the smooth operation of any Cub Cadet engine. However, over time, carburetors can develop issues that affect engine performance and overall efficiency.
Identifying these common signs of carburetor problems can help you address the issues promptly and keep your Cub Cadet running at its best.
Engine struggling to start
One of the most apparent signs of a carburetor problem is when your Cub Cadet engine struggles to start.
If you find yourself repeatedly pulling the starter cord without success, it may indicate that the carburetor isn’t supplying the right mixture of fuel and air to the engine.
This problem commonly occurs due to a clogged or dirty carburetor. Over time, debris and varnish can build up in the small passageways, blocking the flow of fuel.
This can prevent the engine from starting or lead to an inconsistent idle. In such cases, cleaning or replacing the carburetor may be necessary to restore proper fuel delivery.
Poor engine performance and stalling
Carburetor problems can also manifest in poor engine performance and frequent stalling. If you notice that your Cub Cadet engine is running rough, has reduced power, or struggles during acceleration, it may be a sign that the carburetor needs attention.
Similar to the starting issue, a clogged or dirty carburetor can restrict the flow of fuel, leading to lean or rich fuel mixtures.
This imbalance can result in poor combustion and cause the engine to run poorly or stall. An inspection of the carburetor and cleaning any blockages may be necessary to restore optimal engine performance.
Black smoke emissions
Excessive black smoke emissions from the exhaust of your Cub Cadet can be indicative of a carburetor problem.
If the carburetor is delivering too much fuel to the engine, it can result in a rich fuel mixture. The excess fuel doesn’t completely burn, leading to the production of the black smoke.
This issue can arise due to a malfunctioning float valve, improper adjustment of the fuel mixture, or a stuck fuel jet.
It’s essential to address this problem promptly as it can not only impact engine performance but also indicate potential damage to other engine components.
Adjusting the carburetor settings or replacing faulty parts may be necessary to solve this issue and reduce the smoke emissions.
By recognizing and addressing these common signs of carburetor problems, you can keep your Cub Cadet engine running smoothly and efficiently.
Regular maintenance, including cleaning and inspection of the carburetor, can help prevent these issues and ensure optimal performance.
If you’re unsure about diagnosing or fixing carburetor problems, it’s recommended to consult a professional technician or contact Cub Cadet for assistance.
Cleaning And Maintenance Tips For Carburetors
A carburetor is an essential component of a Cub Cadet engine, responsible for the proper mix of air and fuel to power the machine.
Over time, carburetors can develop problems such as clogs, worn-out parts, and debris buildup, leading to decreased engine performance and fuel efficiency.
Regular Cleaning Using Carburetor Cleaner
Regularly cleaning your Cub Cadet carburetor is crucial to ensure optimal engine performance.
When dirt and debris accumulate in the carburetor, it can restrict airflow and disrupt the fuel mixture.
For effective cleaning, follow these steps:
- Disconnect the spark plug wire to prevent accidental engine starting.
- Locate the carburetor. Refer to the Cub Cadet owner’s manual for its exact location.
- Remove the air filter cover and air filter element from the carburetor.
- Using a carburetor cleaner, spray the cleaner directly into the carburetor throat and all its components.
- Allow the cleaner to penetrate and dissolve the dirt and debris for a few minutes.
- Use a small brush or toothbrush to scrub away any remaining residue.
- Rinse the carburetor with clean water to remove the cleaner and debris.
- Dry the carburetor thoroughly before reassembling it.
- Reinstall the air filter element and cover.
Proper Storage During Off-seasons
Proper storage of your Cub Cadet during the off-season is essential to prevent carburetor problems caused by stale fuel or invasive pests.
Follow these tips to ensure your carburetor remains in top condition:
- Drain the fuel tank and carburetor completely to prevent the fuel from deteriorating and clogging the carburetor passages.
- Add a fuel stabilizer to any remaining fuel to extend its shelf life.
- Seal the fuel tank with a cap or plug to prevent moisture or contaminants from entering.
- Store your Cub Cadet in a dry, well-ventilated area to prevent the carburetor from rusting.
- Keep the carburetor covered with a protective hood or cover to prevent dust, dirt, or pests from entering.
Inspection and Replacement of Damaged Parts
Regular inspection of your Cub Cadet carburetor is essential to identify and replace any damaged parts before they cause serious problems.
Here’s what you should do:
- Inspect the carburetor for signs of wear, such as cracks or leaks.
- Check the carburetor gaskets and seals for any damage or deterioration.
- If any parts are damaged, replace them with genuine Cub Cadet parts to ensure proper fit and function.
- Ensure all connections and fasteners are tight and secure.
- Perform a thorough carburetor cleaning following the steps outlined above if any residue or debris is found.
Regular cleaning, proper storage, and inspection of damaged parts are key to keeping your Cub Cadet running smoothly.
Step-By-Step Carburetor Troubleshooting Process
When your Cub Cadet experiences carburetor problems, it can disrupt the smooth operation of your lawn equipment.
The carburetor is responsible for mixing air and fuel in the correct proportions for combustion.
Over time, it may become clogged with debris or experience wear and tear, leading to issues such as reduced power, rough idling, or even engine stalling.
To help you diagnose and resolve these issues, below is a step-by-step carburetor troubleshooting process that you can follow.
Check the fuel filter and lines
In order for the carburetor to receive clean fuel, it is essential to regularly check the fuel filter and lines for any blockages or damage.
These components can become clogged with dirt, old fuel, or other debris that may have accumulated over time. To inspect the fuel filter, follow these steps:
- Locate the fuel filter, typically near the fuel tank or carburetor.
- Remove the fuel line that connects to the filter.
- Inspect the filter for any signs of clogging or debris.
- If necessary, clean or replace the filter.
- Inspect the fuel lines for any cracks, leaks, or kinks. Replace any damaged lines.
Inspect the air filter
A properly functioning air filter is crucial for maintaining the carburetor’s performance. An air filter that is dirty or clogged can restrict airflow, leading to a rich fuel mixture and poor engine performance.
Here’s how you can inspect the air filter:
- Locate the air filter housing, usually positioned near the carburetor.
- Remove the cover or housing to access the filter.
- Inspect the filter for dirt, debris, or signs of wear.
- If the filter is dirty, clean it or replace it with a new one.
- Ensure that the housing and cover are securely reinstalled.
Adjust the idle speed and mixture
If your Cub Cadet is experiencing rough idling or difficulty starting, it may be necessary to adjust the carburetor’s idle speed and mixture.
This can help achieve optimum performance and smooth operation. Follow these steps to make the adjustments:
- Identify the idle speed and mixture adjustment screws on the carburetor.
- Start the engine and let it warm up for a few minutes.
- Using a screwdriver, turn the idle speed screw to achieve the desired idle RPM.
- Next, adjust the mixture screw to achieve the smoothest idle and best overall performance.
- Repeat the adjustments as necessary, ensuring the engine runs smoothly.
Verify the choke operation
The choke plays a crucial role in providing the engine with the correct air-fuel mixture during cold starts.
If the choke is not functioning properly, it can result in difficulties starting the engine or poor performance.
To verify the choke operation:
- Locate the choke lever or knob on your Cub Cadet.
- Start the engine and let it idle.
- Engage the choke by moving the lever or knob to the appropriate position.
- Observe the engine’s response – it should run smoother or easier to start.
- If the engine stalls or does not respond as expected, there may be an issue with the choke mechanism.
Remember to perform regular maintenance and cleanings to keep your carburetor functioning optimally and your lawn equipment running smoothly.
Addressing Specific Carburetor Issues
When it comes to maintaining your Cub Cadet, one of the most common issues you may encounter is related to the carburetor.
The carburetor is a vital component of your mower’s engine, responsible for mixing air and fuel to create the necessary combustion for power.
Over time, however, it is not uncommon for the carburetor to develop problems that can hinder the performance of your mower.
In this section, we will address some specific carburetor issues and provide solutions to help you get your Cub Cadet up and running smoothly again.
Cleaning clogged jets and passages
One of the primary causes of carburetor problems is the buildup of dirt, debris, and varnish in the jets and passages.
This buildup can restrict the flow of fuel and air, leading to poor performance and starting issues.
Here’s how you can do it:
- Remove the carburetor from your Cub Cadet. Refer to your owner’s manual for specific instructions on how to do this.
- Disassemble the carburetor carefully, making sure to keep track of all the small parts.
- Using a carburetor cleaner, spray the jets and passages to remove any accumulated dirt and debris. Be thorough but gentle, ensuring not to damage any sensitive components.
- Inspect the parts for any signs of wear or damage. Replace any worn-out or damaged components.
- Reassemble the carburetor, following the reverse order of disassembly.
- Reinstall the carburetor onto your Cub Cadet and test for improved performance.
Fixing leaks and vacuum issues
Leaking fuel or vacuum issues can also lead to carburetor problems.
To address these issues, follow these steps:
- Inspect the carburetor for any visible leaks or cracks. If you spot any, you may need to replace the carburetor or the affected parts.
- Check the gaskets and seals for any signs of wear or damage. Replace any worn-out or damaged gaskets or seals.
- Ensure that all the connections between the carburetor and the engine are tight and secure.
- Inspect the vacuum lines for any leaks or obstructions. If you find any issues, replace the damaged lines or clear the obstructions.
- Once you have addressed any leaks or vacuum issues, reinstall the carburetor onto your Cub Cadet and test for improved performance.
Resolving flooding or fuel overflow problems
Flooding or fuel overflow problems can occur when the carburetor’s float valve is not functioning properly.
If you are facing this issue, follow these steps to resolve it:
- Remove the carburetor from your Cub Cadet.
- Inspect the float valve for any signs of damage or wear. If necessary, replace it.
- Check the float level to ensure it is adjusted correctly. Use a float level gauge or follow the manufacturer’s instructions.
- Inspect the needle valve seat for any debris or wear. Clean or replace it as needed.
- Reassemble the carburetor, following the reverse order of disassembly.
- Reinstall the carburetor onto your Cub Cadet and test for resolved flooding or fuel overflow issues.
Regular maintenance and proactive troubleshooting will help keep your mower running smoothly season after season.
Identifying And Fixing Fuel Supply Problems
A properly functioning carburetor is essential for the smooth operation of your Cub Cadet. However, over time, you may encounter fuel supply problems that can hinder its performance.
Check the fuel tank and lines for blockages
One common cause of fuel supply problems in a Cub Cadet carburetor is blockages in the fuel tank or lines.
To identify and fix this issue, follow these steps:
- Inspect the fuel tank: Begin by visually examining the fuel tank. Look for any signs of debris, dirt, or sediment that may have accumulated at the bottom. If you notice any blockages, remove them carefully.
- Examine the fuel lines: Next, check the fuel lines for any kinks, clogs, or damage. If you find any issues, replace the damaged or clogged fuel lines to ensure smooth fuel flow.
- Clean or replace the fuel filter: Additionally, it’s important to clean or replace the fuel filter regularly. A clogged fuel filter can restrict fuel flow, leading to carburetor problems. Remove the fuel filter, clean it thoroughly, or replace it if necessary.
Test the fuel pump and fuel delivery system
The fuel pump and fuel delivery system play a crucial role in supplying fuel to the carburetor.
If these components are not functioning correctly, it can cause fuel supply issues.
To test and address these problems, take the following steps:
- Inspect the fuel pump: Start by inspecting the fuel pump for any signs of damage or malfunction. Ensure that the fuel pump is securely connected to the engine.
- Check the fuel pump vacuum line: Verify that the vacuum line connected to the fuel pump is intact and not damaged. A faulty vacuum line can disrupt the fuel delivery system.
- Test the fuel pump operation: To test the fuel pump’s operation, disconnect the fuel line from the carburetor. Turn on the ignition and check if fuel flows freely from the disconnected line. If the fuel pump is not delivering fuel, it may need to be replaced.
Address fuel quality issues
Fuel quality plays a vital role in the performance of your Cub Cadet’s carburetor. Poor fuel quality can cause carburetor problems.
To address fuel quality issues, consider the following:
- Use fresh, clean fuel: Always use fresh and clean fuel to prevent fuel contamination. Stale or contaminated fuel can clog the carburetor and impede its performance.
- Consider using fuel additives: Fuel additives can help improve the quality and performance of the fuel. Additives such as fuel stabilizers or cleaners can remove deposits, prevent corrosion, and optimize fuel combustion.
- Store fuel properly: If you store fuel for an extended period, ensure to use a fuel stabilizer and store it in an airtight container to prevent degradation.
By following these steps to identify and fix fuel supply problems in your Cub Cadet carburetor, you can restore its optimal performance and ensure a smooth mowing experience.
Advanced Troubleshooting Techniques
Using a Carburetor Rebuild Kit
Are you experiencing issues with your Cub Cadet carburetor? Advanced troubleshooting techniques can help you get to the root of the problem and get your equipment running smoothly again.
One effective method is using a carburetor rebuild kit, which can solve a range of common problems.
By following a few simple steps, you can overhaul your carburetor and restore optimal performance to your Cub Cadet machine.
To begin with, gather all the necessary tools and materials, including a carburetor rebuild kit specifically designed for your Cub Cadet model.
These kits typically include essential components such as gaskets, seals, springs, and needles.
Before you start the rebuild process, carefully read the instructions provided with the kit to familiarize yourself with the specific steps for your carburetor model.
The first step is to disassemble the carburetor, removing any debris or gunk that may be clogging the various passages and jets.
Inspect each component for signs of wear or damage, and replace as necessary. Thoroughly clean each part using a carburetor cleaner, making sure to remove any stubborn residue that could impede proper functioning.
Once the carburetor is clean, carefully reassemble it, ensuring that each component is properly aligned and securely fastened.
Pay close attention to the placement and orientation of gaskets and seals to prevent any leaks. Once reassembled, reinstall the carburetor on your Cub Cadet machine and test its performance.
Adjusting High-Speed Needle Settings
Another advanced troubleshooting technique for Cub Cadet carburetor problems is adjusting the high-speed needle settings.
This technique can help you optimize the carburetor’s fuel-to-air mixture, ensuring efficient operation and preventing issues such as rough idling or sluggish acceleration.
Start by locating the high-speed needle adjustment screw on the carburetor. This screw is usually located on the side or bottom of the carburetor’s main body.
Use a flat-head screwdriver to turn the screw in small increments, either clockwise or counterclockwise, depending on the specific recommendations for your Cub Cadet model.
It’s important to make minor adjustments and test the engine’s performance after each turn of the screw.
Pay attention to changes in engine sound and responsiveness. If the engine runs smoothly and doesn’t have any issues with acceleration, you can conclude that the high-speed needle is properly adjusted.
However, if the engine becomes too lean or too rich with fuel, further adjustments may be needed.
Remember that improper adjustments to the high-speed needle can cause engine damage or poor performance, so it’s important to proceed with caution and follow the manufacturer’s recommendations. If you’re unsure about making these adjustments yourself, it’s best to seek professional help to avoid any costly mistakes.
Seeking Professional Help When Necessary
While using carburetor rebuild kits and adjusting high-speed needle settings can often resolve common Cub Cadet carburetor problems, there may be instances where professional assistance is needed.
Seeking help from a trained technician can provide peace of mind and ensure that any underlying issues are identified and addressed correctly.
Professional technicians have the expertise and diagnostic tools necessary to troubleshoot and repair complex carburetor problems that may be beyond the scope of a typical DIY repair.
They can accurately diagnose the issue, replace any faulty components, and fine-tune the carburetor settings to restore optimal performance.
When considering professional help, ensure that you choose a reputable Cub Cadet service center or authorized dealer.
They will have the knowledge and experience to handle any carburetor problems specific to your Cub Cadet model. By relying on their expertise, you can avoid unnecessary frustration and potential damage to your equipment.
Preventive Measures For Long-Term Carburetor Health
Your Cub Cadet’s carburetor plays a crucial role in the overall performance and efficiency of your machine.
Over time, however, it can suffer from various problems such as clogs, leaks, and general wear and tear.
To ensure your carburetor stays in optimal condition and your mower keeps running smoothly, it’s important to take preventive measures.
By incorporating a few simple habits into your maintenance routine, you can extend the lifespan of your carburetor and avoid costly repairs.
In this article, we will discuss some preventive measures you can take for long-term carburetor health.
Using Fuel Stabilizers
One of the key causes of carburetor problems is the gas left in the tank for long periods without use.
When the fuel evaporates, it leaves behind a sticky residue that can clog the carburetor jets and passages.
To avoid this issue, it’s highly recommended to use a fuel stabilizer, specifically designed to keep fuel fresh and prevent it from breaking down.
Fuel stabilizers reduce the oxidation process, ensuring that the fuel remains stable for longer durations.
Regularly Inspecting and Cleaning the Carburetor
Regular inspection and cleaning of your Cub Cadet’s carburetor are essential to maintain its optimal performance.
Over time, dirt, debris, and varnish can accumulate inside the carburetor, affecting fuel flow and overall engine efficiency.
It’s important to visually inspect the carburetor for any signs of buildup or damage. In case you notice any blockages or wear, it’s recommended to clean the carburetor thoroughly.
To clean the carburetor, you can follow these simple steps:
- Disconnect the spark plug wire and remove the air filter.
- Remove the carburetor bowl by unscrewing the retaining nut.
- Use a carburetor cleaner to spray and remove any dirt or varnish from the internal components.
- Carefully clean all the passages and jets using a small wire brush or a compressed air canister.
- Reassemble the carburetor and ensure all connections are secure.
- Lastly, reattach the air filter and spark plug wire before testing the mower.
Maintaining Proper Fuel and Oil Levels
Ensuring your Cub Cadet has the right fuel and oil levels is essential for the long-term health of the carburetor.
Running the mower with low fuel can cause the carburetor to draw in air, leading to a lean fuel mixture and potential damage.
Additionally, running the machine with insufficient or dirty oil can increase friction and cause excessive wear on the internal carburetor components.
Regularly monitor and maintain the fuel and oil levels as recommended by the manufacturer. This will not only keep your mower running smoothly but also prolong the life of your carburetor.
Frequently Asked Questions
What Are Common Signs Of Cub Cadet Carburetor Problems?
Some common signs of Cub Cadet carburetor problems include difficulty starting the engine, rough running or stalling, poor fuel efficiency, and black smoke coming from the exhaust.
These signs may indicate issues with fuel flow and combustion, and it is essential to address them promptly to ensure optimal performance and longevity of your equipment.
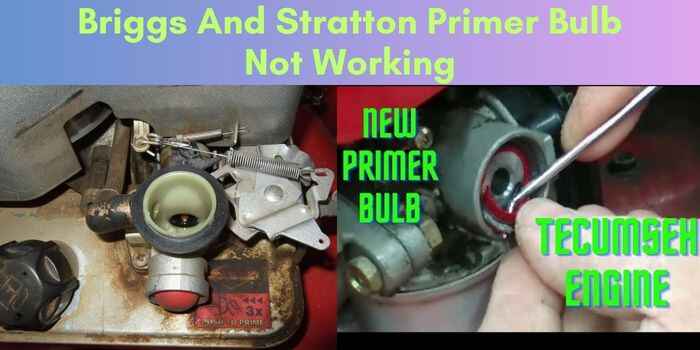
How Can I Clean The Cub Cadet Carburetor?
To clean the Cub Cadet carburetor, start by removing it from the engine. Use a carburetor cleaner to remove any dirt, debris, or varnish buildup from the carburetor parts. Pay special attention to the jets, passages, and small orifices. After cleaning, reassemble the carburetor and reinstall it on the engine.
Regular cleaning and maintenance of the carburetor can help prevent issues and keep your equipment running smoothly.
Why Is My Cub Cadet Carburetor Flooding?
There can be several reasons for a Cub Cadet carburetor flooding. It may be due to a stuck or damaged float valve, a faulty needle and seat assembly, or an improperly adjusted float height. These issues can cause excessive fuel flow, resulting in flooding.
It is recommended to check and properly adjust the float height and replace any faulty components to resolve this problem.
Conclusion
If you’re experiencing problems with your Cub Cadet carburetor, don’t worry. With some troubleshooting and regular maintenance, you can get your equipment running smoothly again.
Remember to clean the carburetor regularly, check for any clogs or dirty components, and make adjustments as needed.
By following these steps, you’ll be able to ensure efficient fuel delivery and keep your Cub Cadet working like new for years to come.