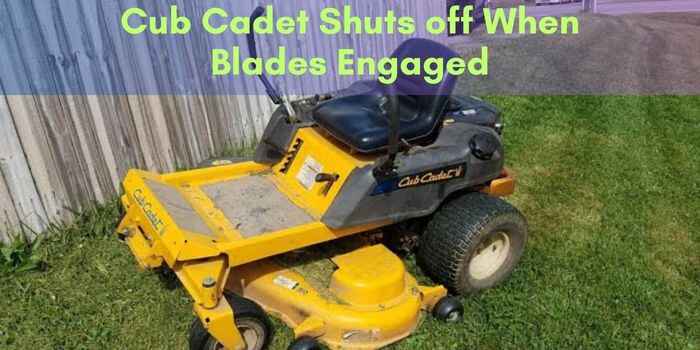
Cub Cadet Electrical Problems : Troubleshooting Tricks!
Cub Cadet electrical problems can be resolved with proper troubleshooting and maintenance techniques. We will explore common electrical issues that Cub Cadet owners may encounter and provide solutions to fix them.
Whether it’s a dead battery, faulty starter, or wiring problems, understanding how to diagnose and resolve these issues will help ensure a smooth operation of your Cub Cadet equipment. By adhering to a regular maintenance schedule and following the troubleshooting steps outlined here, you can keep your Cub Cadet running smoothly for years to come.
So, let’s dive in and get your Cub Cadet back up and running in no time!
Common Electrical Problems In Cub Cadet
When it comes to maintaining your Cub Cadet lawn mower, electrical problems can be frustrating and disrupt your mowing routine. However, understanding these common electrical issues can help you troubleshoot and resolve them quickly, keeping your Cub Cadet running smoothly. In this section, we will explore three common electrical problems in Cub Cadet and how to address them effectively.
Battery Not Charging
If your Cub Cadet battery is not charging, it can prevent your mower from starting and functioning properly. This problem can occur due to various reasons, such as a faulty voltage regulator, damaged wiring, or a dead battery. To diagnose and fix this issue:
- Check the Battery Voltage: Use a multimeter to measure the battery voltage. It should read around 12 volts. If the voltage is significantly lower, the battery may need to be charged or replaced.
- Inspect the Wiring: Examine the wiring connections between the battery, voltage regulator, and other components. Look for loose or damaged wires and ensure they are securely connected.
- Test the Voltage Regulator: If the battery and wiring are in good condition, the voltage regulator may be the culprit. Consult your Cub Cadet’s manual for instructions on testing and replacing the voltage regulator.
- Charge or Replace the Battery: If the battery is old or unable to hold a charge, consider charging or replacing it to resolve the charging issue.
Mower Stalling During Operation
Annoyingly, your Cub Cadet may experience stalling issues while mowing. This hiccup can be caused by several electrical factors:
- Faulty Spark Plug: A worn-out or dirty spark plug can cause the mower engine to stall. Remove the spark plug, inspect its condition, and clean or replace it if necessary.
- Dirty Air Filter: A clogged air filter restricts airflow to the engine, resulting in stalling. Clean or replace the air filter regularly to prevent this issue.
- Fuel Issues: Incorrect fuel mixture or a clogged fuel filter can also cause stalling. Check the fuel quality and ensure the fuel filter is clean and unclogged.
- Ignition System Problems: A malfunctioning ignition switch, coil, or other ignition components can disrupt the engine’s performance. Inspect these parts and replace them as needed.
Headlights Not Working
If the headlights on your Cub Cadet are not functioning, it can affect your visibility when mowing in low light conditions. Consider the following troubleshooting steps:
- Check the Bulbs: Inspect the headlights to determine if the bulbs are burnt out. If so, replace them with compatible bulbs.
- Inspect the Wiring: Examine the wiring connections from the headlights to the battery. Look for loose or damaged wires and ensure proper connections.
- Verify the Switches: Check the headlight switches to ensure they are in the “on” position and functioning correctly. Replace any faulty switches if necessary.
- Test the Fuses: Use a multimeter to test the fuses related to the headlights. If a fuse is blown, replace it with the appropriate rating.
By addressing these common electrical problems in your Cub Cadet, you can maintain its optimal performance and enjoy uninterrupted mowing sessions. Remember to always consult your Cub Cadet’s manual or seek professional assistance if needed.
Troubleshooting Tips For Battery Not Charging
When it comes to maintaining your Cub Cadet, electrical problems can be quite common. One of the most frustrating issues you may face is a battery that refuses to charge. This can leave you unable to start your mower or other garden equipment, causing delays and inconvenience. Luckily, there are a few troubleshooting tips you can follow to identify and resolve the issue.
Check Battery Connections
The first step in troubleshooting a battery not charging problem is to inspect the battery connections. Over time, these connections can become corroded or loose, hindering the flow of electricity. Start by ensuring that the battery cables are securely attached to the battery terminals. Use a wrench to tighten them if necessary. Additionally, check for any signs of corrosion, such as white or greenish deposits. If you notice corrosion, gently clean the battery terminals using a wire brush and a solution made of baking soda and water. Rinse with clean water and dry thoroughly before reconnecting the cables.
Test Battery Voltage
Another common issue that can lead to a battery not charging is a faulty or weak battery. To determine if this is the case, you can test the battery voltage using a multimeter. Switch the multimeter to the DC voltage setting and connect the positive (red) probe to the positive battery terminal, and the negative (black) probe to the negative terminal. A fully charged battery should read around 12.6 volts. If the voltage reading is significantly lower, it may indicate a weak or defective battery that needs to be replaced.
Inspect Charging System Components
If the battery and connections are in good condition, the issue may lie in the charging system components. Inspect the voltage regulator, alternator, and charging cables for any signs of damage or wear. Look for loose or frayed cables, as well as any visible cracks or burns on the voltage regulator or alternator. If you notice any issues, it may be necessary to replace these components or seek professional assistance to ensure proper charging. It’s important to note that the charging system components can vary depending on the specific model of your Cub Cadet equipment, so refer to the manufacturer’s manual for more detailed instructions.
By following these troubleshooting tips, you can potentially diagnose and resolve the issue of a battery not charging in your Cub Cadet equipment. Remember to always prioritize your safety and consult a professional if you are unsure or uncomfortable performing any repairs yourself.
Troubleshooting Tips For Mower Stalling During Operation
Troubleshooting Tips for Mower Stalling During Operation
Are you frustrated with your Cub Cadet mower stalling during operation? This common issue can be caused by various electrical problems. However, don’t worry, because with a few troubleshooting tips, you can identify and fix the problem yourself, saving you time and money.
Clean or Replace Air Filter
A clogged air filter can restrict the airflow to the engine, causing the mower to stall. To clean or replace the air filter:
- Locate the air filter housing, usually located near the carburetor.
- Remove the filter cover and gently tap it to remove dust and debris.
- If the filter is dirty, replace it with a new one.
- Make sure the air filter is properly installed and the housing is closed tightly.
Check Fuel System
A faulty fuel system can also lead to mower stalling. Follow these steps to check your fuel system:
- Ensure the fuel tank is properly filled with fresh gasoline.
- Check the fuel lines for any cracks or leaks.
- Inspect the fuel filter for clogs or blockages and replace if necessary.
- If your mower has a fuel pump, make sure it is functioning correctly.
Inspect Ignition System
The ignition system is crucial for proper mower operation. Here’s how you can inspect it:
- Check the spark plug for signs of wear or damage.
- If the spark plug is dirty or worn out, clean or replace it.
- Ensure the spark plug wire is securely connected to both the plug and ignition coil.
- Inspect the ignition coil for any damage or loose connections.
By troubleshooting these common electrical problems, you can increase the chances of resolving your Cub Cadet mower stalling issue. Remember to regularly maintain your mower to prevent future problems and ensure optimal performance.
Troubleshooting Tips For Headlights Not Working
Are you experiencing electrical problems with your Cub Cadet and finding that the headlights are not working? This can be frustrating, especially when you’re trying to work late into the evening or when visibility is low. In this section, we will provide you with some troubleshooting tips to help you identify and resolve the issue with your headlights. By following these steps, you can get your headlights functioning properly and regain the visibility you need.
Check Bulbs and Wiring Connections
The first step in troubleshooting your Cub Cadet’s headlights is to check the bulbs and wiring connections. Over time, bulbs may burn out or become loose, and wiring connections can become corroded or disconnected. Here are a few steps to guide you through this process:
- Start by locating the headlight bulbs on your Cub Cadet.
- Inspect the bulbs for any signs of damage, such as a broken filament or a discolored appearance. If the bulbs appear to be damaged, replace them with new ones.
- Next, examine the wiring connections for any signs of corrosion, loose connections, or frayed wires. If you notice any issues, clean the connections or repair the wiring as necessary.
Test Headlight Switch
If the bulbs and wiring connections are in good condition, the next step is to test the headlight switch. The switch is responsible for turning the headlights on and off, so it may be the cause of the problem. To test the switch, follow these steps:
- Locate the headlight switch on your Cub Cadet. It is typically located near the dashboard or on the control panel.
- Turn the switch on and off several times while observing the headlights. If the headlights flicker or fail to turn on, the switch may be faulty and should be replaced.
- If the switch appears to be working properly, move on to the next step.
Inspect Fuses and Circuit Breakers
If the bulbs, wiring connections, and headlight switch are all functioning correctly, the problem may lie with the fuses or circuit breakers. These components protect the electrical system from overload and can sometimes trip or blow, causing the headlights to stop working. Here’s how you can inspect the fuses and circuit breakers:
- Refer to your Cub Cadet’s owner’s manual to locate the fuse box or circuit breaker panel.
- Carefully inspect the fuses and circuit breakers for any signs of damage, such as a blown fuse or a tripped breaker. If you find any damaged components, replace them with new ones of the same amperage rating.
- If all the fuses and circuit breakers are intact, it’s best to consult a professional technician to further diagnose and resolve the issue.
By following these troubleshooting tips, you can efficiently identify the cause of your Cub Cadet’s headlights not working and take the necessary steps to resolve the issue. Whether it’s a simple bulb replacement or a more complex electrical repair, addressing the problem promptly will ensure that you can operate your Cub Cadet safely and effectively, even in low-light conditions.
Maintenance Tips To Prevent Electrical Problems
When it comes to Cub Cadet electrical problems, prevention is key. By taking a few simple maintenance steps, you can keep your equipment running smoothly and avoid costly repairs. In this article, we’ll discuss some essential maintenance tips to prevent electrical problems, including how to clean battery terminals regularly, replace spark plugs, and check electrical system components for wear.
<h3>Clean Battery Terminals Regularly</h3>
One of the most common culprits of Cub Cadet electrical problems is dirty or corroded battery terminals. Over time, dirt and corrosion can build up on the terminals, impeding the flow of electricity and causing issues with your equipment’s electrical system. To prevent this problem, it’s essential to clean the battery terminals regularly.
To clean the battery terminals:
- Start by disconnecting the battery cables, making sure to remove the negative cable first.
- Inspect the terminals for any signs of corrosion or buildup. If you notice any, use a wire brush to gently scrub away the dirt and corrosion.
- After cleaning the terminals, rinse them with a mixture of baking soda and water to neutralize any remaining acid.
- Dry the terminals thoroughly and apply a thin layer of dielectric grease to help prevent future corrosion.
- Finally, reattach the battery cables, making sure to connect the positive cable first.
<h3>Replace Spark Plugs</h3>
Another maintenance tip to prevent Cub Cadet electrical problems is to regularly replace the spark plugs. Over time, spark plugs can become worn or fouled, leading to difficulties starting the equipment or poor engine performance. By replacing the spark plugs at regular intervals, you can ensure a strong and consistent spark, enhancing your equipment’s electrical system.
To replace the spark plugs:
- Start by locating the spark plug wires and removing them from the old spark plugs.
- Using a spark plug socket and ratchet, carefully remove the old spark plugs from the engine.
- Inspect the new spark plugs for any signs of damage and ensure they are the correct size and type for your equipment.
- Using a torque wrench, install the new spark plugs, being careful not to overtighten them.
- Finally, reconnect the spark plug wires to the new spark plugs, ensuring they are securely attached.
<h3>Check Electrical System Components for Wear</h3>
To prevent electrical problems with your Cub Cadet, it’s crucial to regularly check the electrical system components for wear. Over time, wires can become frayed, connectors can loosen, and switches can wear out. By inspecting these components and addressing any signs of wear or damage, you can prevent electrical issues before they occur.
To check electrical system components:
- Visually inspect the wiring harnesses, looking for any signs of fraying, cuts, or abrasions.
- Check the connectors for any signs of looseness or corrosion. If necessary, clean the connectors and tighten them securely.
- Test the switches to ensure they are functioning correctly. If a switch is not working as expected, consider replacing it.
- If you encounter any damaged or faulty components during your inspection, promptly replace them to prevent potential electrical problems.
By following these maintenance tips, you can keep your Cub Cadet equipment running smoothly and avoid unnecessary electrical problems. Regularly cleaning battery terminals, replacing spark plugs, and checking electrical system components for wear will help ensure you have a reliable and efficient machine for years to come.
When To Seek Professional Help
Having electrical problems with your Cub Cadet can be a frustrating experience. While there are some electrical issues that you can tackle on your own, there are others that require the expertise of a professional. Knowing when to seek professional help can save you time, money, and further damage to your equipment. In this article, we will discuss complex electrical issues, limited technical expertise, and warranty coverage, all of which are indications that it’s time to call in the experts.
Complex Electrical Issues
Some electrical problems with your Cub Cadet might be more complex than others. These can include issues such as a completely dead battery, malfunctioning ignition switch, or faulty wiring harness. Trying to diagnose and fix these issues without proper knowledge and experience can lead to further complications and potential safety hazards.
If you find yourself facing these complex electrical issues, it’s best to leave it to the professionals. An expert technician will have the expertise and necessary tools to diagnose the problem accurately and resolve it efficiently. They can save you from the hassle and frustration of trial and error and ensure that your Cub Cadet is back up and running in no time.
Limited Technical Expertise
Not all of us are born with technical expertise, and that’s perfectly okay. Cub Cadet electrical systems can be complex, and attempting repairs without the necessary knowledge can do more harm than good. Without proper understanding, you might accidentally damage other components, void your warranty, or even put yourself at risk.
If you’re unsure about how to proceed or lack confidence in your technical skills, it’s wise to seek professional help. The knowledge and expertise of a trained technician can alleviate your worries and ensure that the repairs are done correctly. You can have peace of mind, knowing that your Cub Cadet is in capable hands.
Warranty Coverage
Another factor to consider when deciding whether to seek professional help is your warranty coverage. Cub Cadet equipment often comes with a warranty that protects you against manufacturing defects and certain types of damage. Attempting to fix electrical issues on your own can potentially void this warranty.
Before attempting any repairs, review your warranty terms and conditions. Some warranties explicitly state that only authorized professionals can perform repairs, while others might require certain procedures or documentation. Engaging a professional technician will not only ensure that your warranty remains intact but may even lead to cost savings if the repairs are covered under warranty.
In conclusion, when faced with complex electrical issues, limited technical expertise, or warranty coverage concerns, it’s best to seek professional help for your Cub Cadet. Professionals have the knowledge, experience, and tools to diagnose and resolve electrical problems efficiently and effectively. Their expertise will save you time, prevent further damage, and provide peace of mind. Remember, investing in professional help is an investment in the longevity and performance of your Cub Cadet.
Frequently Asked Questions On Cub Cadet Electrical Problems
What Are The Common Electrical Problems With Cub Cadet Lawn Mowers?
Common electrical problems with Cub Cadet lawn mowers include issues with the battery, starter, ignition switch, and wiring.
How Can I Troubleshoot An Electrical Problem With My Cub Cadet Mower?
To troubleshoot an electrical problem with your Cub Cadet mower, start by checking the battery connections, fuses, and the condition of the wiring. You can also test the ignition switch and starter solenoid. If the problem persists, it’s recommended to consult a professional technician.
Why Won’T My Cub Cadet Mower Start?
If your Cub Cadet mower won’t start, it could be due to an electrical problem. Check the battery, starter, ignition switch, and wiring for any issues. Ensure the battery is fully charged, the connections are tight, and all fuses are intact.
If the problem persists, it’s best to seek professional help.
Conclusion
To avoid Cub Cadet electrical problems, regular maintenance and inspections are crucial. Keep an eye on the battery, wiring connections, and fuses, ensuring they are clean and secure. Promptly address any signs of trouble, such as dim lights or starting difficulties, to prevent further issues.
Implementing these practices can extend the life of your Cub Cadet and ensure a smooth operation. Remember, prevention is always better than cure when it comes to electrical problems in your equipment.