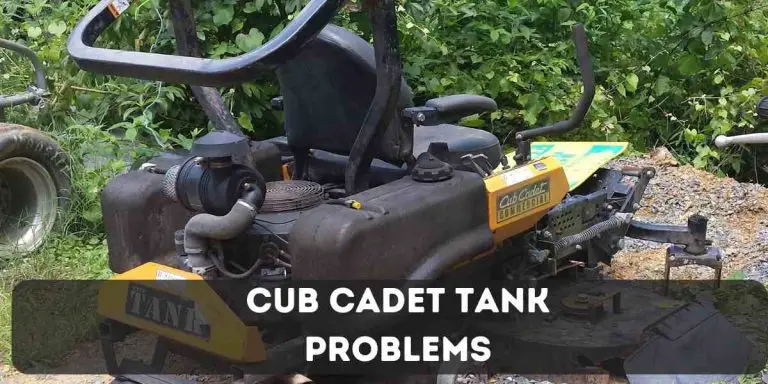

Cub Cadet I1046 Hydrostatic Problems: Troubleshooting Tips & Fixes
The Cub Cadet I1046 hydrostatic problems can be resolved by troubleshooting and addressing any issues with the hydrostatic transmission. Introducing their line of hydrostatic lawn mowers, the Cub Cadet I1046 is a popular choice amongst homeowners.
However, like any piece of machinery, it can experience certain problems with its hydrostatic transmission. If you find yourself facing issues such as the mower not moving forward or backward or experiencing a loss of power, it is important to troubleshoot the problem and address any underlying issues.
By following a few simple steps, you can diagnose and rectify hydrostatic problems in your Cub Cadet I1046. We will discuss common problems and their solutions to help you get your lawn mower up and running smoothly again.
Common Hydrostatic Problems
Hydrostatic transmissions are widely used in Cub Cadet I1046 lawn tractors due to their efficiency and ease of use. However, like any mechanical system, hydrostatic transmissions can experience problems over time.
Here will discuss the most common hydrostatic problems that you may encounter with your Cub Cadet I1046, including leaking hydrostatic transmission, lack of power/weak drive, and hydrostatic transmission slipping.
Leaking Hydrostatic Transmission
A leaking hydrostatic transmission can be frustrating and potentially damaging to your Cub Cadet I1046. It is essential to address this issue promptly to avoid further complications. Let’s explore the causes of leakage and the steps to fix the leak.
Causes of Leakage:
There are several reasons why your hydrostatic transmission may be leaking:
- Worn or damaged seals
- Loose or faulty fittings
- Cracked or damaged transmission housing
- Excessive pressure or overfilled transmission
How to Identify the Leak:
Identifying the source of the leak is crucial in determining the appropriate solution. Here are a few steps to help you identify the leak:
- Inspect the transmission for visible signs of oil or fluid.
- Check the fittings and seals for any signs of damage or looseness.
- Observe the transmission while the engine is running to identify any active leaks.
Steps to Fix the Leak:
Once you have identified the source of the leak, follow these steps to fix it:
- Replace any worn or damaged seals.
- Tighten or replace any loose or faulty fittings.
- If the transmission housing is cracked or damaged, consider replacing it.
- Ensure the transmission fluid level is within the recommended range and not overfilled.
Lack of Power/Weak Drive
If you notice a lack of power or weak drive while operating your Cub Cadet I1046, it can hinder your productivity and make cutting grass a challenging task. Let’s explore possible causes for this issue, symptoms to look out for, and solutions to increase power and drive performance.
Possible Causes for Reduced Power:
There are several factors that can contribute to a lack of power and weak drive:
- Worn or damaged drive belt
- Clogged air filter
- Dirty fuel filter
- Spark plug issues
Symptoms of Weak Drive:
If you experience any of the following symptoms, it may indicate a weak drive:
- Slower than usual forward or reverse movement
- Difficulty climbing inclines or uneven terrain
- Increased mowing time and reduced efficiency
Solutions to Increase Power and Drive Performance:
To enhance power and drive performance, consider the following solutions:
- Inspect and replace any worn or damaged drive belts.
- Clean or replace the air filter to ensure proper airflow.
- Replace the fuel filter to maintain fuel flow.
- Check and clean the spark plug or replace if necessary.
Hydrostatic Transmission Slipping
A slipping hydrostatic transmission can be a frustrating problem that affects the overall performance of your Cub Cadet I1046.
Understanding the signs and reasons for transmission slippage is crucial in finding an effective solution.
Let’s explore the signs, reasons, and methods to fix a slipping hydrostatic transmission.
Signs of a Slipping Transmission:
Here are some common signs that indicate a slipping hydrostatic transmission:
- Loss of power during operation
- Delayed or jerky movement
- Unusual noise or grinding
Reasons for Transmission Slippage:
There are several potential reasons why your hydrostatic transmission may be slipping:
- Low fluid levels or dirty transmission fluid
- Worn or damaged drive belts
- Maladjusted control linkage
Methods to Fix a Slipping Hydrostatic Transmission:
To fix a slipping hydrostatic transmission, consider the following methods:
- Check and refill the transmission fluid to the recommended level.
- If the fluid is dirty or contaminated, consider performing a transmission fluid flush.
- Inspect and replace any worn or damaged drive belts.
- Adjust the control linkage to ensure proper engagement of the transmission.
Maintenance Tips For Hydrostatic Transmission
Regular maintenance of the hydrostatic transmission is vital for keeping your Cub Cadet I1046 running smoothly and efficiently.
This crucial component of the mower’s powertrain requires specific attention to ensure optimal performance and prevent potential problems.
Here, including regular fluid checks and changes, proper belt tension, and the importance of cleaning and lubricating the system.
Regular Fluid Checks and Changes
One of the key factors in maintaining a healthy hydrostatic transmission is regular fluid checks and changes. The fluid used in the transmission system plays a critical role in providing lubrication, cooling, and hydraulic pressure.
Over time, this fluid can degrade and become less effective, leading to diminished performance and potential damage to the system.
Importance of fluid maintenance: Regular fluid checks and changes are crucial to ensure the transmission operates smoothly. Fresh, clean fluid helps maintain optimal performance and extends the lifespan of the transmission components.
How often to check and change the fluid: It is recommended to check the fluid level and condition at least once every mowing season or every 50 hours of operation, whichever comes first.
Additionally, the fluid should be changed every 100 hours or once a year, depending on the manufacturer’s recommendations.
Step-by-step guide for checking and changing the fluid:
Follow these steps to check and change the fluid in your Cub Cadet I1046’s hydrostatic transmission:
- Locate the transmission fluid reservoir on your mower.
- Carefully remove the reservoir cap to access the fluid.
- Check the fluid level by using the dipstick or the sight glass, depending on your model.
- If the fluid level is low, add the recommended transmission fluid until it reaches the proper level.
- To change the fluid, drain the old fluid by removing the drain plug or using a pump. Dispose of the old fluid properly.
- Refill the transmission with the recommended fluid, making sure not to overfill.
- Replace the reservoir cap securely.
- Start the mower and let it run for a few minutes to circulate the new fluid.
- Check the fluid level again and adjust if necessary.
Proper Belt Tension
Belt tension is another crucial aspect of maintaining the hydrostatic transmission’s performance. The drive belt connects the engine pulley to the transmission, transferring power and controlling speed.
It is essential to ensure the drive belt has the correct tension to prevent slippage and ensure efficient power transfer.
Role of belt tension in hydrostatic transmission: Proper belt tension is crucial for maintaining smooth operation and preventing excessive wear on the transmission components. Improper belt tension can lead to slipping, decreased performance, and premature belt failure.
How to check and adjust belt tension: Follow these steps to check and adjust the belt tension:
- Disconnect the spark plug wire to prevent accidental engine startup.
- Locate the tension adjustment bolt or nut on the mower deck, which controls the position of the idler pulley.
- Slightly loosen the adjustment bolt or nut, allowing the idler pulley to move.
- Apply moderate pressure to the center of the belt, checking for proper deflection.
- If the belt is too loose, tighten the adjustment bolt or nut to increase tension. If it’s too tight, loosen the adjustment bolt or nut.
- Recheck the belt tension and adjust as necessary.
- Securely tighten the adjustment bolt or nut.
- Reconnect the spark plug wire.
Benefits of maintaining proper belt tension: By maintaining proper belt tension, you can ensure optimal power transfer, prevent belt slippage, and extend the lifespan of the drive belt and transmission components.
Cleaning and Lubricating
Cleaning and lubricating the hydrostatic transmission system is vital to remove debris, prevent rust, and ensure smooth operation.
Regular cleaning and lubrication can help maintain optimal performance and prevent potential problems caused by dirt and moisture buildup.
Importance of cleaning and lubricating the transmission system:
Cleaning and lubricating the transmission system helps remove dirt, debris, and moisture that may affect performance and cause damage over time. It also helps prevent rust and corrosion, extending the lifespan of the system.
Equipment and supplies needed for cleaning and lubrication:
To clean and lubricate the hydrostatic transmission, you will need the following equipment and supplies:
- Clean lint-free cloths or rags
- Degreaser or mild detergent
- Water hose or pressure washer
- Lubricating oil recommended by the manufacturer
Step-by-step process for cleaning and lubricating the transmission:
Follow these steps to clean and lubricate the hydrostatic transmission:
- Start by removing any debris or dirt from the transmission housing using a lint-free cloth or rag.
- Dampen a clean cloth with a degreaser or mild detergent, and carefully clean the transmission housing, gears, and other components.
- Rinse the transmission system with water using a hose or pressure washer to remove any remaining dirt or detergent.
- Dry the transmission thoroughly using a clean cloth.
- Apply a small amount of lubricating oil to the gears and other moving parts as recommended by the manufacturer.
- Wipe off any excess oil with a clean cloth.
By following these maintenance tips for the hydrostatic transmission of your Cub Cadet I1046, you can ensure optimal performance, extend the lifespan of the components, and enjoy a smoother mowing experience.
Regular fluid checks and changes, proper belt tension, and cleaning and lubrication are all essential aspects of a well-maintained hydrostatic transmission system.
Incorporate these practices into your regular maintenance routine, and you’ll reap the benefits of a mower that runs reliably and efficiently season after season.
Troubleshooting Steps For Hydrostatic Problems
In order to ensure the smooth operation of your Cub Cadet I1046 hydrostatic system, it’s important to be aware of potential issues that may arise.
By following the proper troubleshooting steps, you’ll be able to identify and resolve any hydrostatic problems that may be affecting the performance of your mower.
This section will guide you through the process of inspecting, testing, diagnosing, and replacing faulty parts in your hydrostatic system.
Performing a Thorough Inspection
Before diving into testing and diagnosing the hydrostatic system, it’s essential to perform a thorough inspection.
This will help you identify any visual signs of wear or damage, which can be early indicators of hydrostatic problems. Here are some key areas to inspect:
Visual signs of wear or damage
Inspect the drive belts for any signs of fraying or excessive wear. Check for leaks in the hydrostatic system, paying close attention to hoses, connectors, and the transmission. Examine the pulleys, idler arms, and tensioner to ensure they are not damaged or misaligned.
Inspect the control lever and linkage for any signs of corrosion or binding.
Checklist for a comprehensive inspection
Creating a checklist can help ensure that you don’t miss any crucial areas during the inspection. Here’s a comprehensive checklist to guide you:
|
|
Testing and Diagnosing the Hydrostatic System
Once you’ve completed the inspection, it’s time to move on to testing and diagnosing the hydrostatic system. This will help you determine the root cause of the problem. Here’s what you’ll need:
Tools needed for testing and diagnosing
Gather the following tools before starting the testing process:
- Pressure gauge
- Multimeter
- Wrench set
- Socket set
Common tests and measurements
Performing a series of common tests and measurements can provide valuable insights into the health of your hydrostatic system. These tests may include:
- Checking hydraulic fluid pressure
- Testing for voltage continuity
- Measuring voltage output
- Verifying control lever operation
Interpreting the results and identifying the issue
After conducting the tests, carefully analyze the results. Look for any discrepancies or abnormalities that may indicate a specific problem. By analyzing the data, you’ll be able to pinpoint the issue and determine the appropriate course of action.
Replacing Faulty Hydrostatic Parts
If the testing and diagnosing process reveals a faulty part within the hydrostatic system, replacing it is necessary to restore proper functionality. Here’s what you need to know:
Identifying the parts that may need replacement
Based on the testing results, you’ll have a better understanding of which components might be causing the hydrostatic problems. Typically, these may include:
- Hydraulic pump
- Control valve
- Transmission
- Hoses and connectors
Step-by-step guide for replacing faulty components
Replacing the faulty hydrostatic parts requires careful attention to detail and a systematic approach. Follow this step-by-step guide:
- Consult the user manual or service guide for detailed instructions on part replacement.
- Disconnect the power source and ensure the mower is in a secure position.
- Remove the necessary covers, fasteners, or components to access the faulty part.
- Disconnect any hoses or electrical connections attached to the part.
- Remove the faulty component and replace it with the new one.
- Reconnect any hoses, electrical connections, or other attachments to the new part.
- Reassemble the mower, ensuring all fasteners and components are securely in place.
- Refill the hydraulic system with the appropriate fluid, following manufacturer guidelines.
Precautions and tips for a successful replacement
When replacing hydrostatic parts, it’s important to keep the following precautions and tips in mind:
- Always wear protective gloves and eyewear to prevent injury.
- Follow the specific torque specifications provided by the manufacturer for fasteners.
- Double-check all connections and ensure they are secure before operating the mower.
- Dispose of the old parts properly and in accordance with local regulations.
By adhering to these troubleshooting steps, you’ll be able to effectively address hydrostatic problems with your Cub Cadet I1046 mower. Remember to consult your user manual or seek professional assistance if you encounter any difficulties during the troubleshooting process.
Frequently Asked Questions
What Are The Common Hydrostatic Problems In Cub Cadet I1046?
Some common hydrostatic problems in Cub Cadet I1046 include loss of power, leaking fluid, and difficulty in shifting gears. These issues can arise due to a faulty transmission or a malfunctioning hydraulic system. Regular maintenance and proper care can help prevent these problems.
How Can I Troubleshoot A Hydrostatic Problem In My Cub Cadet I1046?
To troubleshoot a hydrostatic problem in your Cub Cadet I1046, check the fluid level and condition, inspect for any leaks or damaged hoses, and ensure the belt is properly adjusted. If the problem persists, it is recommended to consult a professional technician for further diagnosis and repair.
How Do I Maintain The Hydrostatic System In My Cub Cadet I1046?
To maintain the hydrostatic system in your Cub Cadet I1046, regularly check the fluid level and quality, ensure the belt is properly tensioned, clean and lubricate the parts, and follow the manufacturer’s recommended maintenance schedule. This will help prolong the lifespan of the hydrostatic system and prevent potential problems.
Conclusion
To summarize, dealing with hydrostatic problems on your Cub Cadet I1046 can be frustrating. However, understanding the common issues and knowing how to troubleshoot them can save you time and money. Remember to regularly maintain and inspect your mower to prevent future problems.
By following these tips and seeking professional assistance when needed, you can keep your Cub Cadet I1046 running smoothly and efficiently for years to come. Happy mowing!
Read More:
Lawn Mower Not Cutting Low Enough