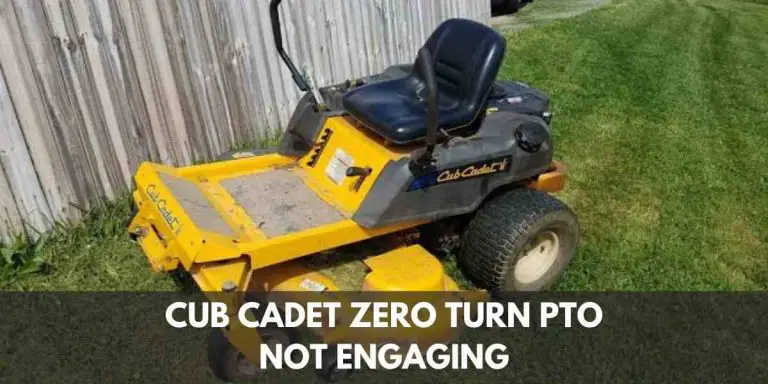
Cub Cadet Transmission Problems: Troubleshoot and Resolve with Ease
Cub Cadet transmission problems can be resolved by addressing the underlying issue and implementing the necessary repairs or replacements. With proper troubleshooting and maintenance, these problems can be successfully mitigated and the transmission can be restored to its optimal functionality.
Cub Cadet is a reputable brand known for its quality outdoor power equipment, including lawn tractors and zero-turn mowers. However, like any mechanical system, the transmission of a Cub Cadet machine can sometimes encounter issues. These problems may range from difficulty in shifting gears or tractor stalling when the transmission is engaged to complete failure of the transmission to respond.
It is crucial to diagnose the problem accurately to determine the appropriate repair or replacement solution. By understanding common transmission issues and implementing the necessary fixes, Cub Cadet owners can ensure smooth operation and long-lasting performance from their equipment.
Troubleshooting Gear Shifting Issues
As a Cub Cadet owner, having trouble with gear shifting can be frustrating and could potentially impact the performance of your lawn equipment. If you are experiencing issues with slipping gears, difficulty engaging gears, or grinding noises during gear shifting, it is important to troubleshoot the problem promptly to avoid further damage to your Cub Cadet transmission. In this section, we will discuss how to address these common gear shifting issues.
Slipping Gears
One of the gear shifting problems that Cub Cadet owners may encounter is slipping gears. This issue can prevent your Cub Cadet from effectively transferring power from the engine to the wheels, resulting in poor acceleration and reduced performance. To troubleshoot this problem, follow these steps:
- Check the transmission fluid level: Ensure that the transmission fluid is at the appropriate level and not contaminated. Low or dirty fluid can hinder proper gear engagement.
- Inspect the drive belt: A worn or damaged drive belt can cause slipping gears. Examine the belt for any signs of wear or damage, such as fraying or cracks. Replace if necessary.
- Adjust the control linkage: Improperly adjusted control linkage can cause gear slippage. Refer to your Cub Cadet owner’s manual for instructions on how to adjust the control linkage properly.
- Inspect the clutch: A malfunctioning clutch can also lead to gear slipping. Check if the clutch is engaging and disengaging properly. If there are any issues, consult a professional for further assistance.
Difficulty Engaging Gears
If you are having trouble engaging gears on your Cub Cadet, it is essential to address this issue promptly to maintain the functionality of your lawn equipment. Follow these troubleshooting steps to resolve difficulty engaging gears:
- Check the gear selector: Ensure that the gear selector is in the correct position. Sometimes, it may not engage gears properly if it is not properly aligned.
- Inspect the gear linkage: Examine the gear linkage for any signs of damage or misalignment. Damaged or misaligned gear linkage can hinder the engagement of gears. Make necessary repairs or adjustments as required.
- Examine the clutch pedal: A loose or worn-out clutch pedal can also cause difficulty in engaging gears. Test the clutch pedal for any abnormalities and consult a professional for further inspection if needed.
- Check for debris or obstructions: Sometimes, debris or obstructions in and around the transmission area can prevent gears from engaging properly. Clean the area and remove any obstacles that may interfere with gear engagement.
Grinding Noises During Gear Shifting
Grinding noises during gear shifting in your Cub Cadet can indicate underlying transmission issues that need to be resolved. Follow these steps to troubleshoot grinding noises:
- Check the clutch adjustment: Improper clutch adjustment can cause grinding noises while shifting gears. Adjust the clutch according to the manufacturer’s guidelines to ensure proper engagement.
- Inspect the gear synchronizers: Worn-out or damaged gear synchronizers can result in grinding noises. If you suspect an issue with the synchronizers, consult a professional for further inspection and repair.
- Assess the transmission fluid: Insufficient or contaminated transmission fluid can also lead to grinding noises. Ensure the fluid is at the correct level and replace if necessary.
- Look for worn or damaged gears: Examine the gears for any signs of wear or damage. Worn or damaged gears may need to be replaced to eliminate grinding noises during gear shifting.
By troubleshooting these gear shifting issues promptly, you can maintain the optimal functioning of your Cub Cadet transmission and ensure a smooth and efficient operation of your lawn equipment.
How To Identify Belt-Related Problems
When it comes to the smooth operation of your Cub Cadet, the drive belt plays a crucial role. However, with regular use, the belt can become worn-out or damaged, leading to transmission problems. Identifying these belt-related issues early on can save you time and money in the long run. In this section, we will guide you through the signs of a worn-out or damaged belt, the steps to inspect and replace the drive belt, and how to adjust the belt tension for smoother operation.
Signs of a worn-out or damaged belt
Recognizing the signs of a worn-out or damaged drive belt is essential in maintaining the performance of your Cub Cadet. Here are a few indicators that your belt may need attention:
- Slipping: If you notice a loss of power or a slipping sensation while operating your Cub Cadet, it could be a sign that the drive belt is worn-out or loose.
- Squealing or squeaking noises: Unusual noises coming from your Cub Cadet’s transmission area, especially when engaging the drive system, may indicate a problem with the drive belt.
- Visible wear or damage: Inspect the drive belt for any signs of wear, such as cracks, fraying, or brittleness. Any visible damage should be addressed promptly.
Steps to inspect and replace the drive belt
Inspecting and replacing the drive belt on your Cub Cadet is a relatively straightforward process. Follow these steps:
- Before starting any maintenance, ensure your Cub Cadet is turned off and the engine is cool.
- Locate the drive belt on your Cub Cadet. It is typically found on the lower side of the transmission, connecting the engine to the transmission pulley.
- Closely examine the belt for any signs of wear or damage. If you notice any issues, it’s time to replace the belt.
- If replacement is required, consult your Cub Cadet’s user manual for specific instructions on removing the old belt and installing the new one. Ensure you follow the proper alignment and tensioning procedures.
- After replacing the drive belt, start the engine and engage the transmission to ensure the new belt is operating smoothly.
Adjusting the belt tension for smoother operation
Proper belt tension is crucial for optimal performance and longevity of the drive belt. Here’s how to adjust the belt tension on your Cub Cadet:
- Refer to your Cub Cadet’s user manual for the specific adjustment procedure.
- Typically, belt tension adjustments can be made by loosening the belt tensioner located near the transmission pulley and adjusting the positioning of the belt.
- Once the desired tension is achieved, tighten the belt tensioner to secure the belt in place.
- Test the Cub Cadet’s operation to ensure the belt is adjusted correctly and operating smoothly.
Regularly inspecting and maintaining the drive belt on your Cub Cadet is essential for ensuring smooth and efficient operation. By identifying belt-related problems early and following the appropriate steps for inspection, replacement, and tension adjustment, you can prolong the life of your Cub Cadet and maximize its performance.
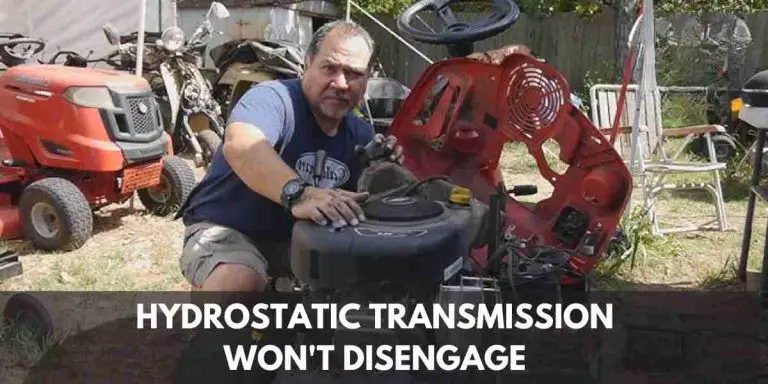
Resolving Hydrostatic Transmission Problems
Understanding the basics of hydrostatic transmissions
Before we delve into troubleshooting and resolving hydrostatic transmission problems, it’s important to understand the basics of how these transmissions work. Hydrostatic transmissions are commonly found in Cub Cadet equipment and use hydraulic fluid to transfer power from the engine to the wheels. Unlike traditional transmissions, hydrostatic transmissions don’t rely on gears to change speed or direction, making them highly efficient and easier to operate. The key components of a hydrostatic transmission include a hydraulic pump, hydraulic motor, and a reservoir for hydraulic fluid.
Troubleshooting common hydrostatic transmission issues
If you’re experiencing issues with your Cub Cadet’s hydrostatic transmission, it’s crucial to troubleshoot the problem to identify the underlying cause. Here are some common problems you might encounter:
- Unresponsive transmission: If your hydrostatic transmission fails to engage or respond when you shift gears, it could be due to a lack of hydraulic fluid or a faulty control linkage. Check the fluid levels and inspect the linkage for any damage or misalignment.
- Slipping transmission: A hydrostatic transmission that slips or fails to maintain speed can indicate an issue with the drive belt, worn pulleys, or insufficient hydraulic pressure. Inspect the drive belt for signs of wear and replace if necessary. Additionally, check the pulleys for any damage or misalignment.
- Strange noises or vibrations: Unusual noises or vibrations coming from the hydrostatic transmission can be a sign of worn or damaged internal components. Inspect the transmission for any leaks, loose bolts, or worn bearings. Replace any faulty parts to avoid further damage.
- Overheating: Hydrostatic transmissions can overheat due to various reasons, such as low fluid levels, excessive load, or a faulty cooling fan. Monitor the fluid levels and ensure proper cooling to prevent overheating. Clean or replace the cooling fan if necessary.
- Fluid leakage: If you notice fluid leaking from the hydrostatic transmission, it’s essential to identify and fix the source of the leak promptly. Inspect all seals, gaskets, and connectors for any signs of damage or wear. Replace any faulty components and ensure proper sealing to prevent further leakage.
Steps to maintain and repair hydrostatic transmissions
Maintaining and repairing your Cub Cadet’s hydrostatic transmission is crucial to ensure optimal performance and longevity. Here are the steps you can follow:
- Regular fluid checks: Monitor the hydraulic fluid levels regularly and maintain them within the manufacturer’s recommended range. Clean the reservoir and replace the fluid if necessary.
- Inspect and clean the filters: Regularly inspect and clean the filters to prevent debris and contaminants from entering the hydraulic system. Replace the filters if they are clogged or damaged.
- Check drive belt and pulleys: Inspect the drive belt for signs of wear, cracking, or stretching. Replace if necessary. Additionally, check the pulleys for any damage or misalignment. Adjust or replace them if needed.
- Proper cooling: Ensure the hydrostatic transmission has adequate cooling to prevent overheating. Clean or replace the cooling fan regularly to maintain proper airflow.
- Address leaks promptly: If you notice any fluid leakage, identify and fix the source of the leak immediately. Replace any damaged seals, gaskets, or connectors to prevent further leaks.
- Follow manufacturer’s manual: Always refer to the manufacturer’s manual for specific maintenance and repair instructions. Adhering to the recommended guidelines will help keep your hydrostatic transmission in optimal condition.
By understanding the basics, troubleshooting common issues, and following proper maintenance procedures, you can effectively resolve hydrostatic transmission problems in your Cub Cadet equipment. Regular maintenance and prompt repairs will help ensure smooth operation and extend the lifespan of your hydrostatic transmission.
Regular Maintenance Tips For Cub Cadet Transmissions
Cub Cadet transmissions are an essential component of your lawn mower, ensuring smooth and efficient operation. However, like any mechanical system, they require regular maintenance to perform at their best. By following these maintenance tips, you can prolong the lifespan of your Cub Cadet transmission and avoid costly repairs down the line.
Checking transmission fluid levels
One of the most important steps in maintaining your Cub Cadet transmission is checking the fluid levels regularly. Low fluid levels can lead to overheating and premature wear of the transmission components. To check the fluid levels:
- Park your Cub Cadet lawn mower on a level surface and engage the parking brake.
- Locate the transmission fluid reservoir, typically positioned near the engine.
- Remove the dipstick and wipe it clean with a cloth.
- Reinsert the dipstick fully and then remove it again to get an accurate reading.
- Ensure that the fluid level falls between the ‘full’ and ‘add’ markings on the dipstick.
- If the fluid level is low, add the recommended type of transmission fluid. Refer to your Cub Cadet owner’s manual for the specific fluid type and capacity.
Changing the transmission fluid
Regularly changing the transmission fluid is crucial to maintain the performance of your Cub Cadet transmission. Over time, the fluid can become contaminated with dirt, debris, and metal particles, which can impair the transmission’s efficiency. Follow these steps to change the transmission fluid:
- Ensure that the engine is off and your Cub Cadet lawn mower is on a level surface.
- Locate the drain plug on the transmission and position a suitable container to collect the old fluid.
- Remove the drain plug and allow the fluid to drain completely into the container.
- Once drained, replace the drain plug and tighten it securely.
- Locate the fill plug and remove it.
- Using a funnel, add the recommended type and amount of transmission fluid through the fill hole.
- Replace the fill plug and tighten it.
Inspecting and cleaning the transmission filter
The transmission filter plays a vital role in preventing debris and contaminants from entering the transmission system. Inspecting and cleaning the filter should be a part of your routine maintenance. To inspect and clean the transmission filter:
- Refer to your Cub Cadet owner’s manual to locate the position of the transmission filter.
- Remove the filter and inspect it for any signs of dirt, debris, or damage.
- If the filter is clogged or damaged, replace it with a new one.
- If the filter is reusable and needs cleaning, carefully clean it with compressed air or a suitable solvent.
- Ensure that the filter is completely dry before reinstalling it.
- Securely reinstall the filter in its original position.
By following these regular maintenance tips for your Cub Cadet transmission, you can keep it running smoothly and efficiently, ensuring a long and trouble-free service life.
Preventative Measures For Long-Lasting Transmissions
When it comes to maintaining the longevity of your Cub Cadet transmission, taking preventative measures plays a crucial role. By following these simple yet effective techniques, you can ensure a long-lasting, reliable transmission for your equipment. In this article, we will discuss three key areas to focus on: properly using the transmission for different tasks, maintaining a suitable operating temperature, and avoiding excessive loads on the transmission.
Properly using the transmission for different tasks
Using the Cub Cadet transmission properly for different tasks is essential to prevent unnecessary strain and damage. Make sure to familiarize yourself with the different operating modes and settings specific to your Cub Cadet model. This will help you understand which setting is recommended for each task. Whether you are mowing the lawn, towing heavy loads, or navigating uneven terrain, select the appropriate gear range for maximum efficiency and to reduce the risk of transmission problems. Refer to the Cub Cadet owner’s manual for specific instructions on how to operate the transmission for different tasks.
Maintaining a suitable operating temperature
Operating your Cub Cadet transmission within a suitable temperature range is vital for its longevity. High temperatures can cause fluid breakdown and lead to premature wear and tear. On the other hand, extremely low temperatures can hinder the transmission’s performance. To maintain a suitable operating temperature, avoid using your equipment in extreme weather conditions whenever possible. If you must use it in hot weather, ensure proper airflow to prevent overheating. On the contrary, in cold weather, warm up the equipment for a few minutes before engaging the transmission. Following these simple steps will help you maintain an optimal operating temperature, thus prolonging the life of your transmission.
Avoiding excessive loads on the transmission
Excessive loads can put a significant strain on the Cub Cadet transmission, leading to potential problems down the line. To prevent this, be mindful of the weight and capacity limits specified by Cub Cadet for your specific model. Avoid towing loads that exceed the manufacturer’s recommendations, as this can cause unnecessary stress on the transmission components. Additionally, distribute the weight evenly to prevent overloading one side of the equipment, which can lead to uneven wear. By adhering to these guidelines, you can avoid subjecting your transmission to excessive loads and ensure optimal performance and durability.
Upgrades And Modifications To Enhance Transmission Performance
When it comes to Cub Cadet transmission problems, finding ways to enhance transmission performance becomes vital. Upgrades and modifications not only help address potential issues but can also optimize the overall performance of the transmission. In this article, we will explore some effective upgrades and modifications that can improve the durability and efficiency of your Cub Cadet transmission.
Upgrading to a high-performance transmission fluid
One of the simplest yet effective upgrades you can make to your Cub Cadet transmission is switching to a high-performance transmission fluid. By upgrading from the standard fluid to a premium option, you can significantly enhance the performance and longevity of your transmission. The right fluid can offer better lubrication, improved heat resistance, and reduced friction, resulting in smoother shifting and extended transmission life.
Installing an auxiliary transmission cooler
To prevent overheating and improve the cooling capacity of your Cub Cadet transmission, installing an auxiliary transmission cooler is a wise choice. This additional cooling system works in tandem with the factory cooler to dissipate excess heat, especially during demanding tasks or towing heavy loads. By keeping the transmission fluid at an optimal temperature, an auxiliary transmission cooler can help minimize the risk of transmission damage and ensure smooth operation.
Modifying the transmission for increased durability
To further enhance the durability and resilience of your Cub Cadet transmission, certain modifications can be made. These modifications aim to reinforce weak points and address common vulnerabilities, providing added strength and longevity. One popular modification is the installation of an aftermarket transmission pan that offers increased fluid capacity and improved heat dissipation. Additionally, upgrading the transmission filter to a high-quality, heavy-duty option can provide better filtration and protection against contaminants.
Furthermore, adjusting shift points and firming up shifts can improve overall performance and reduce strain on the transmission. This can be achieved through reprogramming the transmission control module or installing a shift kit, depending on the model and availability.
In conclusion, upgrading and modifying your Cub Cadet transmission can result in significant improvements in performance, durability, and reliability. Whether you opt for a high-performance transmission fluid, an auxiliary transmission cooler, or various modifications, these enhancements can enhance transmission efficiency and prolong its lifespan. By taking proactive measures to address potential issues, you can ensure your Cub Cadet mower operates at its best, allowing you to enjoy an exceptional mowing experience.
Signs You May Need Professional Assistance
Complex transmission problems beyond basic troubleshooting
When it comes to your Cub Cadet mower, it’s not uncommon to encounter transmission problems. While some issues can be resolved through basic troubleshooting, there are instances where professional assistance becomes necessary. Complex transmission problems are one such instance. These problems are typically beyond the scope of basic troubleshooting and require the expertise of a professional.
Complex transmission problems can manifest in various ways. It could be difficulty in shifting gears, strange noises coming from the transmission, or a complete lack of power to the wheels. Whatever the symptoms may be, it’s important to recognize when the situation is beyond your capabilities.
Attempting to tackle complex transmission problems without the necessary knowledge and skills can further damage your mower’s transmission and result in costly repairs. It’s essential to recognize the signs early on and seek professional assistance to avoid exacerbating the issue.
Lack of experience in repairing transmissions
Repairing transmissions requires specific knowledge and expertise. Unless you have experience in handling transmission repairs, it’s best to leave it to the professionals. Lack of experience can lead to improper diagnosis, incorrect repairs, and ineffective solutions. The intricate and delicate nature of a Cub Cadet’s transmission necessitates the skillset possessed by professionals who are well-versed in handling such repairs.
Moreover, attempting to repair the transmission yourself can be a time-consuming process. Without the necessary experience, you may spend hours or even days trying to diagnose and resolve the issue. Time is precious, and professional assistance ensures a quicker and more efficient resolution to your transmission problems.
Warranty concerns and professional guidance
One crucial aspect to consider when dealing with transmission problems is your mower’s warranty. Trying to fix transmission issues yourself may void the warranty provided by Cub Cadet. This means that any future repairs or replacements will come out of your pocket.
By seeking professional assistance, you not only ensure that the repairs are done correctly but also maintain the validity of your warranty. Professional technicians have the expertise to handle transmissions while keeping warranty concerns in mind, ensuring your mower is repaired in compliance with the warranty terms and conditions.
Additionally, professional guidance offers peace of mind. These experts have seen various transmission problems and know the most effective solutions. They can provide advice on preventative maintenance and offer tips to prolong the lifespan of your transmission. By following professional guidance, you can avoid future transmission problems and enjoy a smoothly functioning mower.
Finding And Choosing A Reliable Transmission Repair Service
Recommendations from trusted sources
To ensure you find a reliable transmission repair service for your Cub Cadet, it’s important to seek recommendations from trusted sources. Start by reaching out to fellow Cub Cadet owners and see if they can recommend any repair services they’ve had a positive experience with. Check online forums, social media groups, or even local Cub Cadet clubs for recommendations. Additionally, you can ask for recommendations from trusted mechanics or dealerships specializing in outdoor power equipment. By obtaining recommendations from sources you trust, you can narrow down your options and find a reputable repair service.Important factors to consider when selecting a repair service
When selecting a repair service for your Cub Cadet’s transmission, there are several important factors you should consider. Firstly, it’s crucial to choose a service that specializes in transmission repairs specifically for Cub Cadet equipment. This ensures that they have the knowledge, expertise, and experience to handle any transmission problems your Cub Cadet may be facing. Secondly, consider the reputation of the repair service. Look for online reviews, testimonials, or ratings to gauge the experiences of previous customers. A service with positive feedback and a good reputation is more likely to provide satisfactory repairs. Thirdly, evaluate the pricing and warranties offered by the repair service. Compare prices among different providers to ensure you’re getting a fair deal, and inquire about any warranties or guarantees on the repairs performed. This will give you peace of mind knowing that if any issues arise after the repair, you’re covered. Lastly, consider the location and accessibility of the repair service. Opt for a service that is convenient for you to drop off and pick up your Cub Cadet, as this will save you time and effort in the long run.Questions to ask the repair service provider before making a decision
Before making a decision on which repair service to choose, there are a few important questions you should ask the service provider. These questions will help you assess their expertise, professionalism, and customer service. Ask about their experience with Cub Cadet transmissions specifically, inquiring about the number of similar repairs they have successfully completed. Additionally, ask about the qualifications and certifications of their technicians to ensure they are trained and knowledgeable in transmission repairs. Inquire about the estimated time it will take for the repair and whether they provide any loaner equipment in the meantime. Ask about their pricing structure, including any potential additional costs or hidden fees. Lastly, don’t forget to ask about their warranty or guarantee on the repairs performed to ensure you’re protected in case any issues arise post-repair. By asking these questions, you can make a more informed decision and choose a reliable transmission repair service for your Cub Cadet.Frequently Asked Questions For Cub Cadet Transmission Problems
Why Is My Cub Cadet Transmission Not Engaging?
When your Cub Cadet transmission is not engaging, it can be due to a variety of reasons including low transmission fluid, a faulty solenoid, or a worn-out drive belt. Consulting a professional technician will help diagnose and resolve the issue effectively.
How Do I Fix A Cub Cadet Transmission That Won’T Move?
If your Cub Cadet transmission won’t move, start by checking the drive belt tension and adjusting it if necessary. Additionally, ensure that the transmission fluid is at the recommended level and is not contaminated. If these steps don’t solve the issue, seeking assistance from a qualified technician is recommended.
What Causes A Cub Cadet Transmission To Slip?
A slipping Cub Cadet transmission can be caused by several factors, such as worn-out drive belts, low transmission fluid levels, or a faulty transmission pump. Inspecting and replacing worn parts, replenishing transmission fluid, or seeking professional assistance can help resolve the issue and ensure smooth operation.
Conclusion
Cub Cadet transmission problems can be both frustrating and costly. It is essential to perform regular maintenance and address any issues promptly to ensure the longevity of your mower. By familiarizing yourself with common problems and seeking professional assistance when needed, you can keep your Cub Cadet running smoothly and enjoy a well-manicured lawn all season long.
Remember, prevention is key in avoiding costly repairs down the road. Keep your mower in top shape and reap the benefits of a reliable and efficient machine.