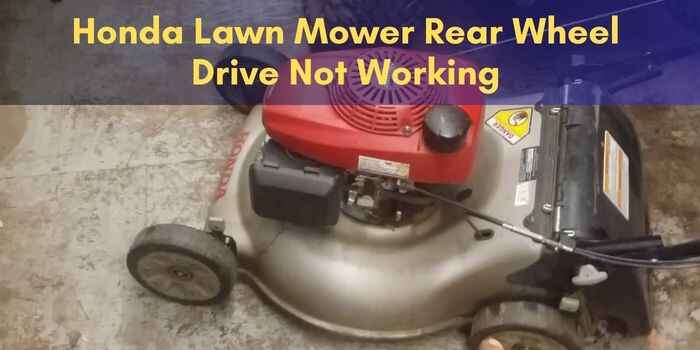
Honda Lawn Mower Rear Wheel Drive Not Working? How to Fix It
If your Honda lawn mower rear wheel drive is not working, it may be due to a broken or misadjusted traction control cable. Check the cable to see if it moves freely, and try lubricating it with oil if necessary.
If lubrication doesn’t solve the issue, you may need to replace the traction control cable.
Diagnosis And Fixes
If your Honda lawn mower’s rear wheel drive is not working, there are several diagnosis and fixes you can try.
Check the traction control cable for any issues or lubricate it if necessary. You may also need to inspect the drive ratchet or gear system of the non-functioning wheel.
Checking The Traction Control Cable:
- Ensure that the mower is turned off and the spark plug is disconnected.
- Locate the traction control cable, which is responsible for engaging the rear wheel drive system.
- Inspect the cable for any signs of damage or wear, such as fraying or kinks.
- Make sure that the cable is properly connected to both the traction control lever and the transmission.
- If the cable is damaged or not connected correctly, it may need to be replaced.
Inspecting The Drive Belt:
- Start by disconnecting the spark plug and ensuring that the mower is turned off.
- Locate the drive belt, which is responsible for transferring power from the engine to the rear wheels.
- Look for any signs of damage or wear, such as cracks or fraying.
- Check the tension of the drive belt by pressing down on it with your finger. It should have some give but not be too loose.
- If the drive belt is damaged or too loose, it may need to be replaced or adjusted.
Examining The Drive Gear Mechanism:
- Disconnect the spark plug and make sure the mower is turned off before starting any inspections.
- Locate the drive gear mechanism, which is responsible for transferring power from the engine to the rear wheels.
- Inspect the gears for any signs of damage or wear, such as chipped teeth or excessive rust.
- Make sure that the gears are properly lubricated with grease.
- If the gears are damaged or not properly lubricated, they may need to be replaced or serviced.
Remember to always refer to the manufacturer’s manual for specific instructions and guidelines when diagnosing and fixing issues with your Honda lawn mower’s rear wheel drive system.
Checking The Traction Control Cable
If your Honda lawn mower’s rear wheel drive is not working, one possible cause could be a faulty traction control cable.
Check the cable to ensure it moves freely, and lubricate it with oil if needed. If the issue persists, consider replacing the cable.
The traction control cable plays a crucial role in the rear wheel drive function of your Honda lawn mower. If you’re experiencing issues with the rear wheel drive not working properly, it’s essential to inspect the traction control cable.
Follow the steps below to check and potentially fix any problems with the cable:
Locating The Traction Control Cable:
- Start by locating the traction control cable on your Honda lawn mower. It is usually connected to the transmission and extends to the rear wheels.
Inspecting For Any Signs Of Damage Or Misadjustment:
- Carefully examine the traction control cable for any signs of damage, such as fraying, kinks, or excessive wear.
- Ensure that the cable is properly adjusted, as a misadjusted cable can affect the performance of the rear wheel drive.
Adjusting The Tension Of The Cable If Necessary:
- If the cable is loose or too tight, it can cause the rear wheel drive to malfunction. To adjust the tension:
- Loosen the nut or bolt that secures the cable to the transmission.
- With a pair of pliers or a wrench, adjust the tension by either tightening or loosening the cable.
- Once the desired tension is achieved, tighten the nut or bolt to secure the cable in place.
Remember to always refer to your mower’s manual for specific instructions and consult a professional if you’re unsure about any aspect of the repair.
Inspecting The Drive Belt
If your Honda lawn mower’s rear wheel drive is not working, one possible cause to inspect is the drive belt.
Check if the belt is worn, damaged, or disconnected, and replace it if necessary to restore the functionality of the rear wheel drive.
When your Honda lawn mower’s rear wheel drive is not working properly, one possible culprit could be a faulty or worn-out drive belt. To diagnose and fix this issue, follow these steps:
Identifying The Location Of The Drive Belt
- Locate the drive belt on your Honda lawn mower. It is usually located on the side or underneath the mower, connecting the engine to the rear wheels.
- Look for a long, rubbery belt that is responsible for transferring power from the engine to the wheels.
Checking For Wear And Tear Or Loose Connections
- Inspect the drive belt for any signs of wear and tear such as cracks, fraying, or stretching. If you notice any of these issues, the belt may need to be replaced.
- Check for any loose connections between the drive belt and the engine or wheels. Make sure all the components are properly aligned and tightened.
Replacing The Drive Belt If Necessary
If the drive belt is damaged or worn out, it is crucial to replace it to restore proper functioning of the rear wheel drive.
Here’s how:
- Remove any obstacles or covers that may be blocking access to the drive belt.
- Loosen the tensioner or release the drive belt from its pulleys.
- Carefully slide off the old belt and replace it with a new one of the same size and specifications.
- Ensure that the new belt is properly seated on the pulleys and aligned with the engine and wheels.
- Tighten the tensioner or reattach the drive belt to its pulleys.
- Test the mower to ensure that the rear wheel drive is now working correctly.
Inspecting the drive belt is an essential step in troubleshooting the rear wheel drive issue of your Honda lawn mower.
Examining The Drive Gear Mechanism
If your Honda lawn mower rear wheel drive is not working, it may be due to an issue with the drive gear mechanism.
Check for any trapped, broken, or missing parts in the drive ratchet or gear system of the non-functioning wheel.
Applying lubrication or replacing the traction control cable may also help resolve the problem.
Watch tutorial videos for step-by-step guidance on how to fix it.
Identifying The Components Of The Drive Gear Mechanism:
- The drive gear mechanism is a crucial part of the Honda lawn mower’s rear wheel drive system. It is responsible for transferring power from the engine to the wheels, allowing the mower to move forward.
- The main components of the drive gear mechanism include the drive gears, gear shafts, drive pulley, and drive belt. These parts work together to provide the necessary power and torque to propel the lawn mower.
- To identify the components of the drive gear mechanism, you may need to remove the rear wheel cover or inspect the underside of the lawn mower. Refer to the mower’s user manual for specific instructions on accessing and examining the drive gear mechanism.
Inspecting For Any Obstructions Or Debris:
- Before troubleshooting the rear wheel drive issue, it’s essential to inspect the drive gear mechanism for any obstructions or debris that may be hindering its operation.
- Begin by removing the rear wheel cover and visually inspecting the drive gears, gear shafts, and other components for any buildup of grass clippings, dirt, or other debris.
- Additionally, check the drive belt, making sure it is not damaged, frayed, or worn out. Any obstructions or debris in the drive belt can impede its movement and affect rear wheel drive performance.
- Use a brush or compressed air to remove any debris or obstructions from the drive gear mechanism. Ensure that all components are clean and free from any blockages.
Lubricating The Gears For Smooth Operation:
- Proper lubrication is crucial for the smooth operation of the drive gear mechanism. Insufficient or worn-out lubrication can cause excessive friction, leading to rear wheel drive issues.
- Begin by identifying the lubrication points on the drive gears, gear shafts, and other movable parts. Refer to the mower’s user manual for specific guidance.
- Apply a small amount of lithium-based grease or any recommended lubricant to the lubrication points, ensuring even coverage. Be cautious not to over-grease, as it can attract dirt and debris.
- After applying the grease, manually rotate the drive gears to distribute the lubricant evenly. This ensures that all moving parts are adequately lubricated and reduces friction for smooth operation.
- Regularly inspect and lubricate the drive gear mechanism to prevent premature wear and maintain optimal rear wheel drive performance.
Test Run And Cleaning
If your Honda lawn mower rear wheel drive is not working, follow these easy steps for a test run and cleaning.
Remove any debris or obstructions from the wheels, check the tires for proper inflation, and lubricate any moving parts.
This should help resolve any issues and get your lawn mower working smoothly again.
Conducting A Test Run Of The Lawn Mower After Troubleshooting:
After troubleshooting the issue with your Honda lawn mower’s rear wheel drive, it’s important to conduct a test run to ensure that the problem has been resolved.
Here’s how to go about it:
- Start the lawn mower and engage the rear wheel drive feature.
- Walk behind the mower and pay attention to the movement of the rear wheels.
- Observe if the wheels are spinning and providing proper traction.
- Test the lawn mower on different terrains, such as grassy areas and inclines, to ensure that the rear wheel drive is functioning properly in various conditions.
- Listen for any unusual noises or vibrations that could indicate a recurring issue.
Ensuring The Rear Wheel Drive Is Functioning Properly:
To ensure that the rear wheel drive of your Honda lawn mower is functioning properly, follow these steps:
- Check the gears and belts connected to the rear wheel drive system for any signs of damage or wear.
- Ensure that the gears are properly lubricated to minimize friction and enable smooth operation.
- Inspect the rear wheels for any debris or grass buildup that could hinder the movement of the drive system.
- Test the engagement mechanism to ensure that it is engaging and disengaging properly.
- If necessary, consult the owner’s manual for specific instructions on how to adjust or repair the rear wheel drive system.
Cleaning The Left Wheel And Removing Any Debris Or Grass Buildup:
Regular maintenance of your Honda lawn mower includes cleaning the wheels to remove any debris or grass buildup.
Here’s how to do it:
- Lift the rear of the lawn mower off the ground to expose the left wheel.
- Use a brush or a cloth to remove any visible debris or grass clippings from the wheel and its surrounding area.
- Check the wheel for any signs of damage, such as cracks or worn treads. Replace the wheel if necessary.
- Inspect the axle and hub for any signs of rust or corrosion. Clean and lubricate them as needed.
- Once the left wheel is clean and in good condition, repeat the process for the right wheel.
Remember, regular cleaning and maintenance of your Honda lawn mower’s wheels will help ensure effective performance and prolong the life of your machine.
Why Is My Honda Self Propelled Lawn Mower Not Driving
Honda lawn mowers are known for their reliability and excellent performance. But what do you do if your trusty self-propelled Honda stops propelling itself?
Let’s investigate some reasons why this happens and the steps you can take to fix the issue.
Common Causes and Solutions
- Worn Drive Belt: The drive belt is the heart of your mower’s self-propel system. It transfers power from the engine to the transmission, which drives the wheels. A worn or stretched belt will slip, preventing the mower from moving forward.
- Solution: Inspect the belt for signs of wear, cracking, or fraying. If it’s damaged, you’ll likely need to replace it.
- Broken or Stretched Drive Cable: The drive control cable connects the self-propel lever to the transmission. If it’s broken or overstretched, it won’t engage the transmission properly.
- Solution: Check the cable for breaks or unusual slack. If the cable is too loose, try adjusting it to take up some slack. If it’s broken, you’ll need to replace it.
- Transmission Issues: The transmission is a complex component, and internal problems can prevent it from transferring power to the wheels. While transmission issues are less common, they can still occur.
- Solution: If you suspect the transmission is at fault, have it examined by a qualified technician.
- Seized Wheels: If your Honda mower’s wheels don’t turn smoothly, it could be due to corroded wheel bearings or debris buildup in the wheel gears.
- Solution: Remove the wheels, clean and lubricate the bearings and gear mechanisms. For severely corroded bearings, you might need to replace them.
How to Troubleshoot Your Honda Mower:
- Check the Basics: Start by making sure the fuel tank isn’t empty and the engine oil level is correct.
- Inspect the Drive Belt: Look for obvious signs of wear, such as cracks or frayed edges. Check if the belt is properly tensioned. Refer to your owner’s manual for instructions on replacing a worn belt.
- Examine the Drive Cable: Ensure the drive cable moves freely and engages the transmission when you squeeze the lever. Adjust the cable if necessary or replace it if damaged.
- Check the Wheels: Make sure the wheels turn smoothly by hand. If they feel stiff, clean and lubricate the wheel components.
How Do You Fix A Self-Propel On A Honda Lawn Mower?
Honda lawn mowers are known for their powerful engines and smooth self-propelled operation.
But when the self-propel functionality decides to take a break, what do you do? Here’s a breakdown of the most common problems and how to fix them.
Understanding the Problem
Before diving into fixes, let’s understand the main reasons why your self-propel might not be working:
- Worn Drive Belt: The belt is responsible for turning the gears to drive the wheels. If it’s old or damaged, it can slip and fail to function properly.
- Broken or Stretched Drive Cable: This cable is how you engage the self-propel. A broken or loose cable won’t transmit the ‘go’ signal to the wheels.
- Transmission Problems: While less likely, the mower’s transmission could have internal issues that a technician needs to address.
Fixing the Issue: Step-by-Step
- Fix a Worn Drive Belt:
- Inspect the Belt: Check for signs of wear like cracks, fraying, or thinning. If you see any of these, it’s time to replace the belt.
- Replace the Belt: Follow the instructions in your Honda owner’s manual. Typically, you’ll need to remove certain mower deck components to access and replace the belt. Online videos can be very helpful.
- Fix a Broken or Stretched Drive Cable:
- Test the Cable: Can you pull the drive cable lever and see the mechanism engage? If not, you likely have a broken cable. If it’s loose, you might just need to adjust it.
- Adjust the Cable: Follow your manual’s instructions for adjusting the cable tension.
- Replace the Cable: If it’s broken, you’ll need to purchase a replacement cable and install it according to the manual’s instructions.
Additional Tips:
- Clean and Lubricate Moving Parts: Regularly cleaning and lubricating the drive mechanism can prevent sticking and extend the life of your parts.
- Check for Obstructions: Sometimes debris like sticks or grass clippings can jam the self-propel system. Clear anything that might cause blockages.
- Refer to Your Owner’s Manual: Always consult your Honda manual for model-specific instructions and diagrams.
Important: If troubleshooting these areas doesn’t solve the problem, or if you feel uncomfortable working on your mower yourself, take it to a trusted Honda repair shop.
Frequently Asked Questions
Why Has My Self Propelled Mower Stopped Propelling?
If your self-propelled mower has stopped propelling, it could be due to a broken or misadjusted traction control cable. Check if the cable moves freely and lubricate it with oil if necessary. If that doesn’t work, you may need to replace the cable.
Another possibility is a trapped, broken, or missing part in the drive ratchet or gear system of one wheel. Compare the drive mechanisms of both wheels to identify the issue. Lastly, if the transmission pulley is spinning but the wheels don’t turn, the transmission may be defective and in need of repair or replacement.
Why Is My Honda Lawn Mower Only One Wheel Turn?
If your Honda lawn mower is only turning one wheel, it may be due to a trapped, broken, or missing part in the drive ratchet or gear system of the non-functioning wheel. Compare the drive mechanisms of both wheels to identify the issue.
Conclusion
If you are experiencing issues with your Honda lawn mower’s rear wheel drive not working, there are several steps you can take to troubleshoot and resolve the problem.
From removing snap rings and reinstalling gears to cleaning and checking tires, there are various maintenance tasks you can perform to ensure the smooth operation of your mower.
Additionally, you can adjust the reverse cable, remove debris and old belts, and reinstall drive cables and wheels. It is important to properly lubricate and clean all components to prevent any further issues.
Lastly, if the transmission pulley is spinning but the wheels don’t turn, it may indicate a defective transmission. By following these steps and performing the necessary repairs, you can get your Honda lawn mower’s rear wheel drive working efficiently once again.